Chad Wallace

Global Ordnance Monolith

Global Ordnance

Monolith Review

  A little over a year ago, Global Ordnance teased their Monolith rifle and pistol. As is usual when introducing a new rifle, it took some time to get them into production. But alas, here we are. I was one of the first few to receive one to fully try out and review! The Monolith rifle has a ton of features over your standard AR15. I think you will like hearing about them. 

  To start with, the Global Ordnance Monolith is not your fathers AR15. Yes, most of the parts are semi-interchangeable with a standard AR15. Some of those compatible parts are the complete upper receiver assembly, trigger, and the safety selectors. For clarification, the Monolith upper can be used on a standard AR, but a standard AR upper can not be used on the Monolith. Other parts are proprietary, but in a good way. 

  You might ask what is in the name “Monolith”? That is where some of the improvements come in. The Monolith is designed with a single piece barrel assembly. So the muzzle brake, gas block, barrel, and barrel extension are all one machined piece. Unlike an AR15 where those would be four separate pieces. The Monolith also utilizes a 45 degree gas tube that uses a fuel injection style fitting. This eliminates needing a roll pin to hold the gas tube in place. So by re-engineering these parts, Global Ordnance has made a stronger and lighter barrel assembly that has less attached components, thus making a barrel system that has less failure points. 

  The first version of the Monolith comes with a Keymo style muzzle brake. As mentioned, this muzzle brake is machined into the barrel, so it is not removable. The Keymo muzzle brake was selected because it is a common muzzle device that can be used with a bunch of different suppressors. It also works very well as a muzzle brake, if you are not wanting to mount a suppressor, or live in a state that does not allow them. Threaded barrel options may be available in the future so that you can install your own muzzle brake of choice. 

  On the rear of the one piece barrel is the barrel extension. The barrel extension is what the bolt locks into to keep the cartridge in the chamber while firing. It also has cut outs, or feed ramps, machined into it. These help guide the cartridges out of the magazine and into the chamber. The Monolith uses an AR10 size extension. This is larger than an AR15 style, so you get more strength. The barrel is made from 4150 ordnance grade steel (the stuff they use on machine gun barrels) for added strength and barrel life. Therefore the extension is also 4150 since it is machined with the barrel. The barrel assembly/barrel extension is then thermal fit into the upper receiver. This is also done for strength, but also gives better accuracy than the slip fit of most AR15 barrels.

  Instead of the standard AR style recoil buffer system, the Monolith uses a bufferless system. The recoil system, as well as the bolt, are housed inside the upper receiver. This allows various things, but the main purpose is to get rid of the AR15's buffer tube.

  By getting rid of the buffer tube, one can install a true folding stock. Global Ordnance went one step farther and built the folding stock mechanism into the firearms lower receiver. The stock folds to the left side of the rifle. This gives you a rifle that can fire with the stock folded, all day long. The stock is a F5 ACR style modular stock system. The Monolith's stock is adjustable for length using some side buttons. It also has a little cheek piece that can be popped up higher. This is nice if using magnified optics. Inside the stock is also a little storage compartment for batteries or whatever. You can only access the compartment when the stock is folded. So if the stock is in the shooting position, those batteries are not falling out. 

  The manual of arms on the Monolith is a little different from a standard AR15. The Monolith's charging handle is a folding lever, forward of the receiver. Not the rear style like in that standard AR I keep mentioning. So the charging handle sits in the rifle's handguard, toward the top picatinny rail, on the left side. It folds forward when not in use. Otherwise, the handguard is a pretty standard MLOK style with a top rail. The charging handle can also be swapped over to the right side. The forward style charging handle works very well and is not hard to get used to. 

  One of my favorite features of the Monolith is that it is full ambidextrous. I already mentioned how the charging handle can be reversed, but there is way more. To start with, the lower receiver has full ambi controls. This includes the mag release, bolt release, and the safety. The safety comes with a short and long paddle, they are reversible to either side. If you want to take the grip off, you can change the safety from 90 degrees to 45. Both sides of the magazine release use a square button. The bolt releases are extended on the bottom to make it far easier to lock the bolt back. A key feature to the Monolith is the ability to drop the open bolt by just pushing down on the dust cover.

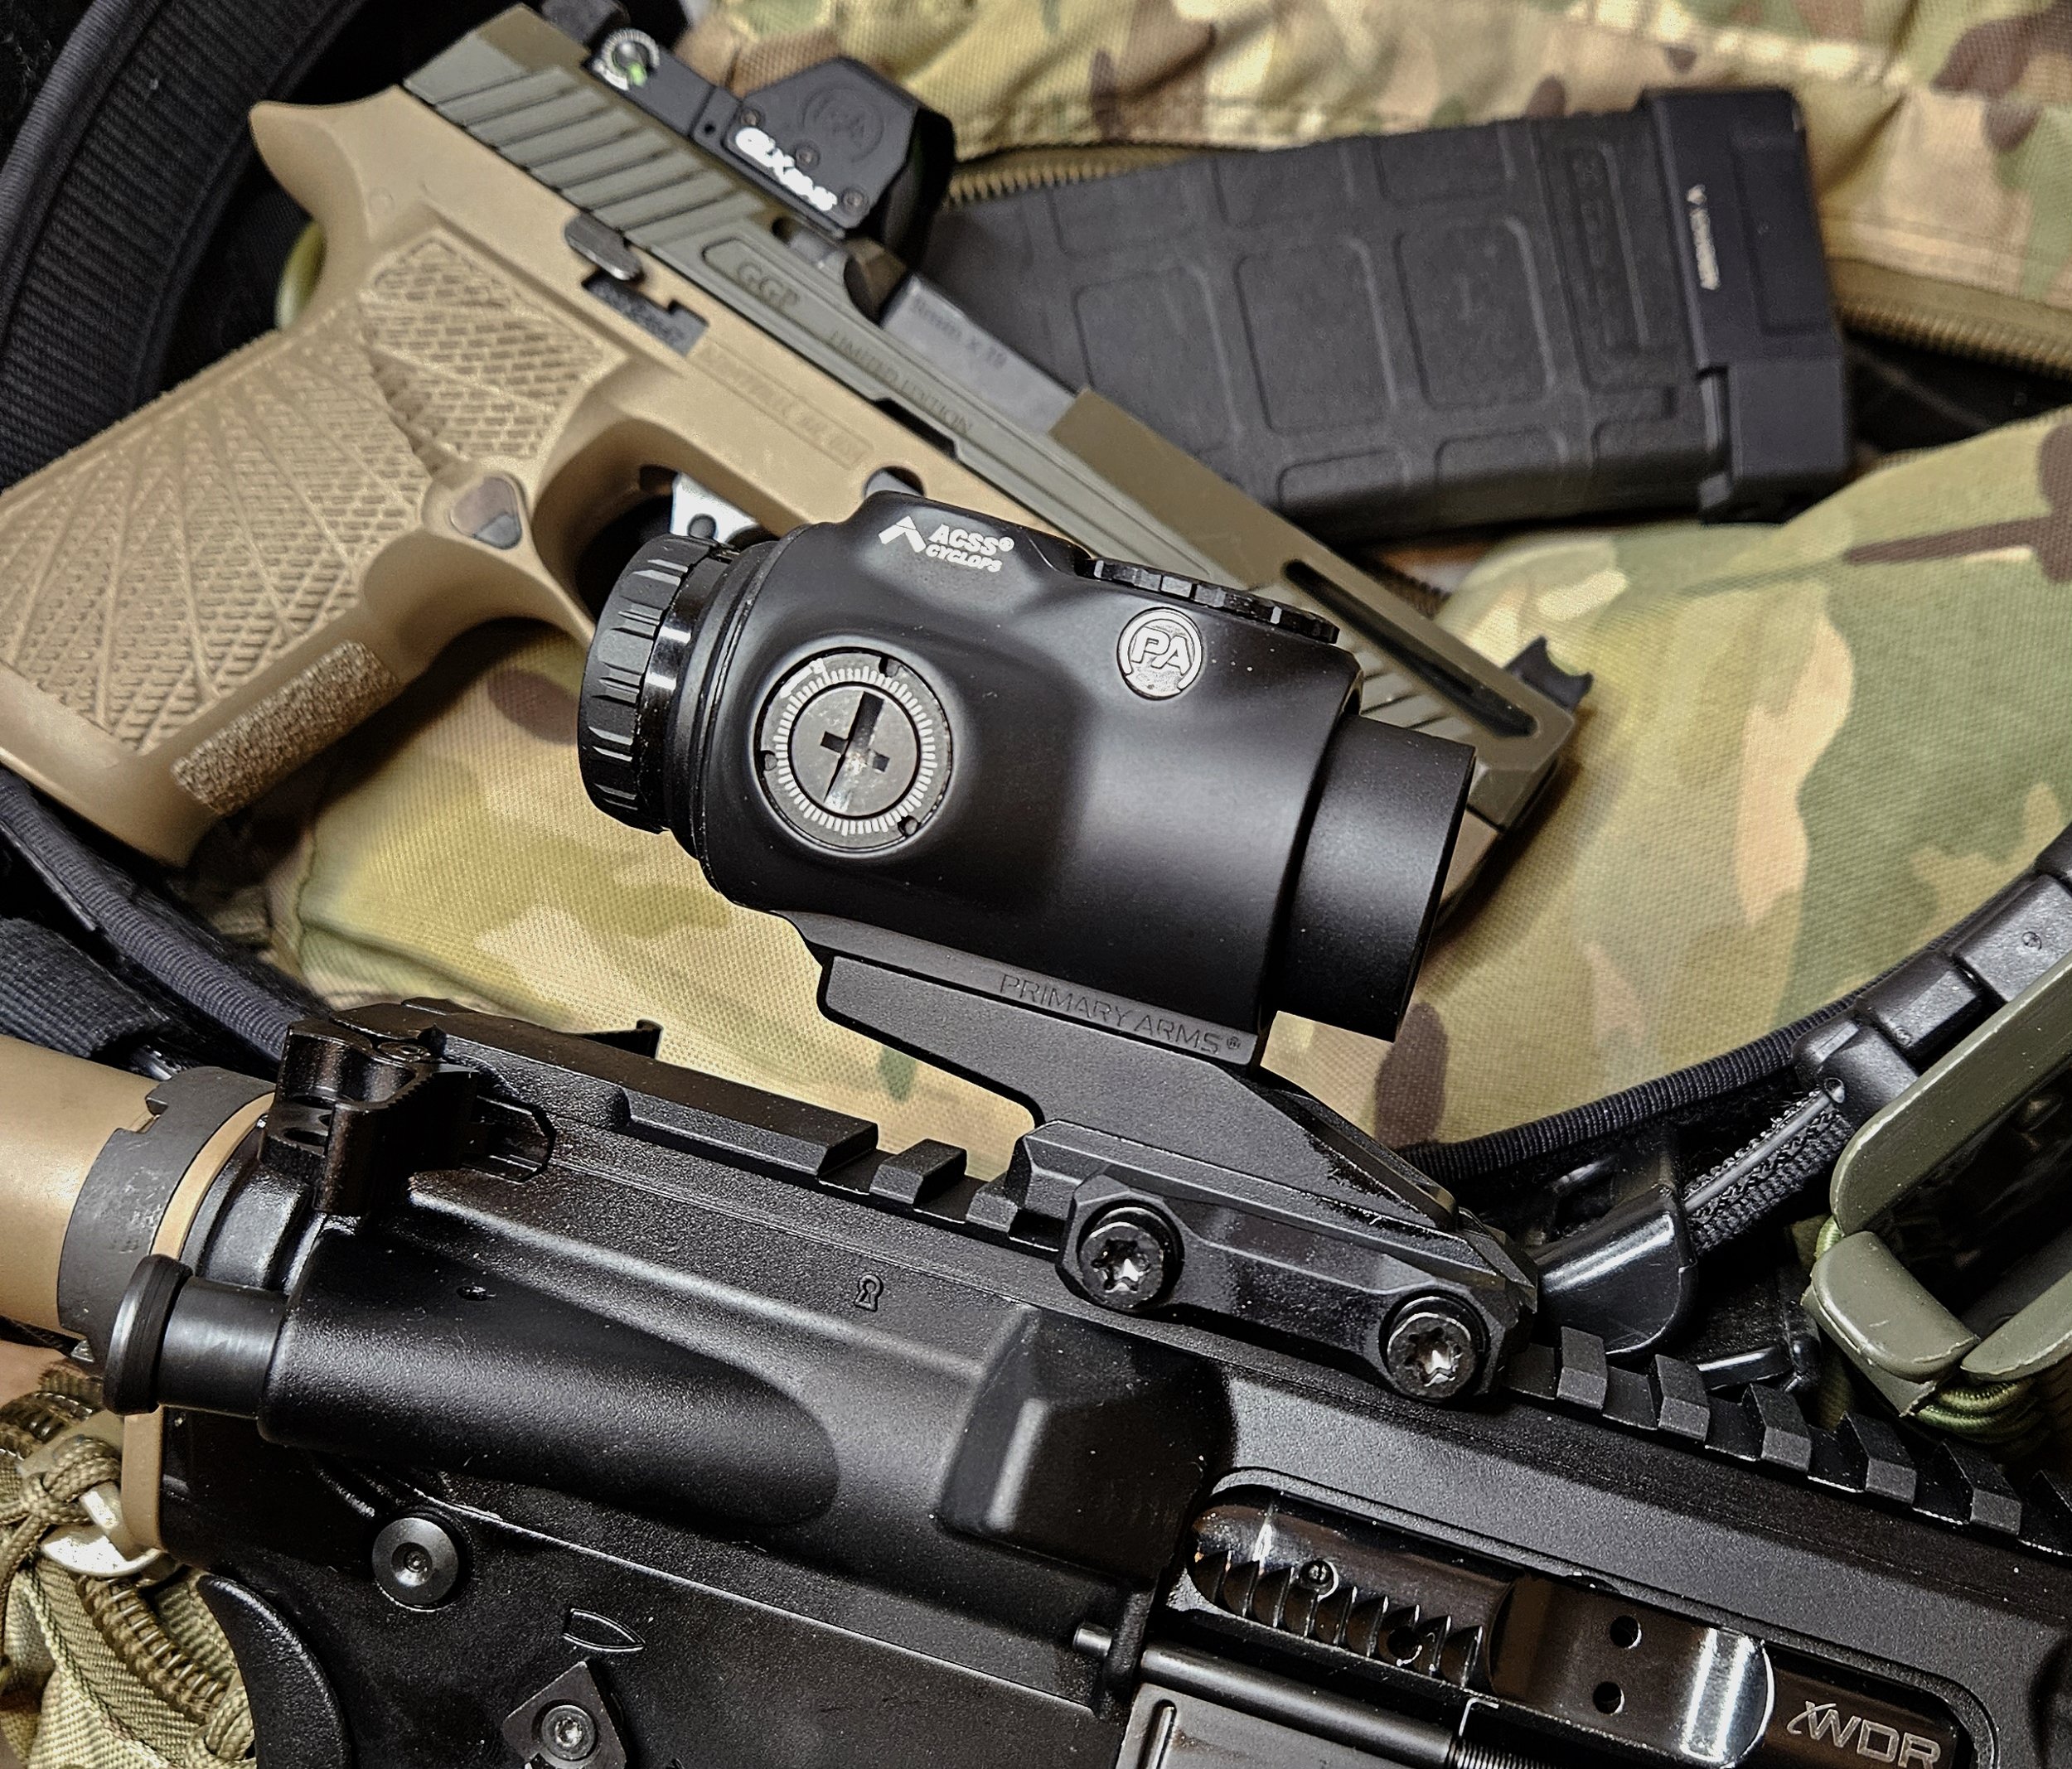
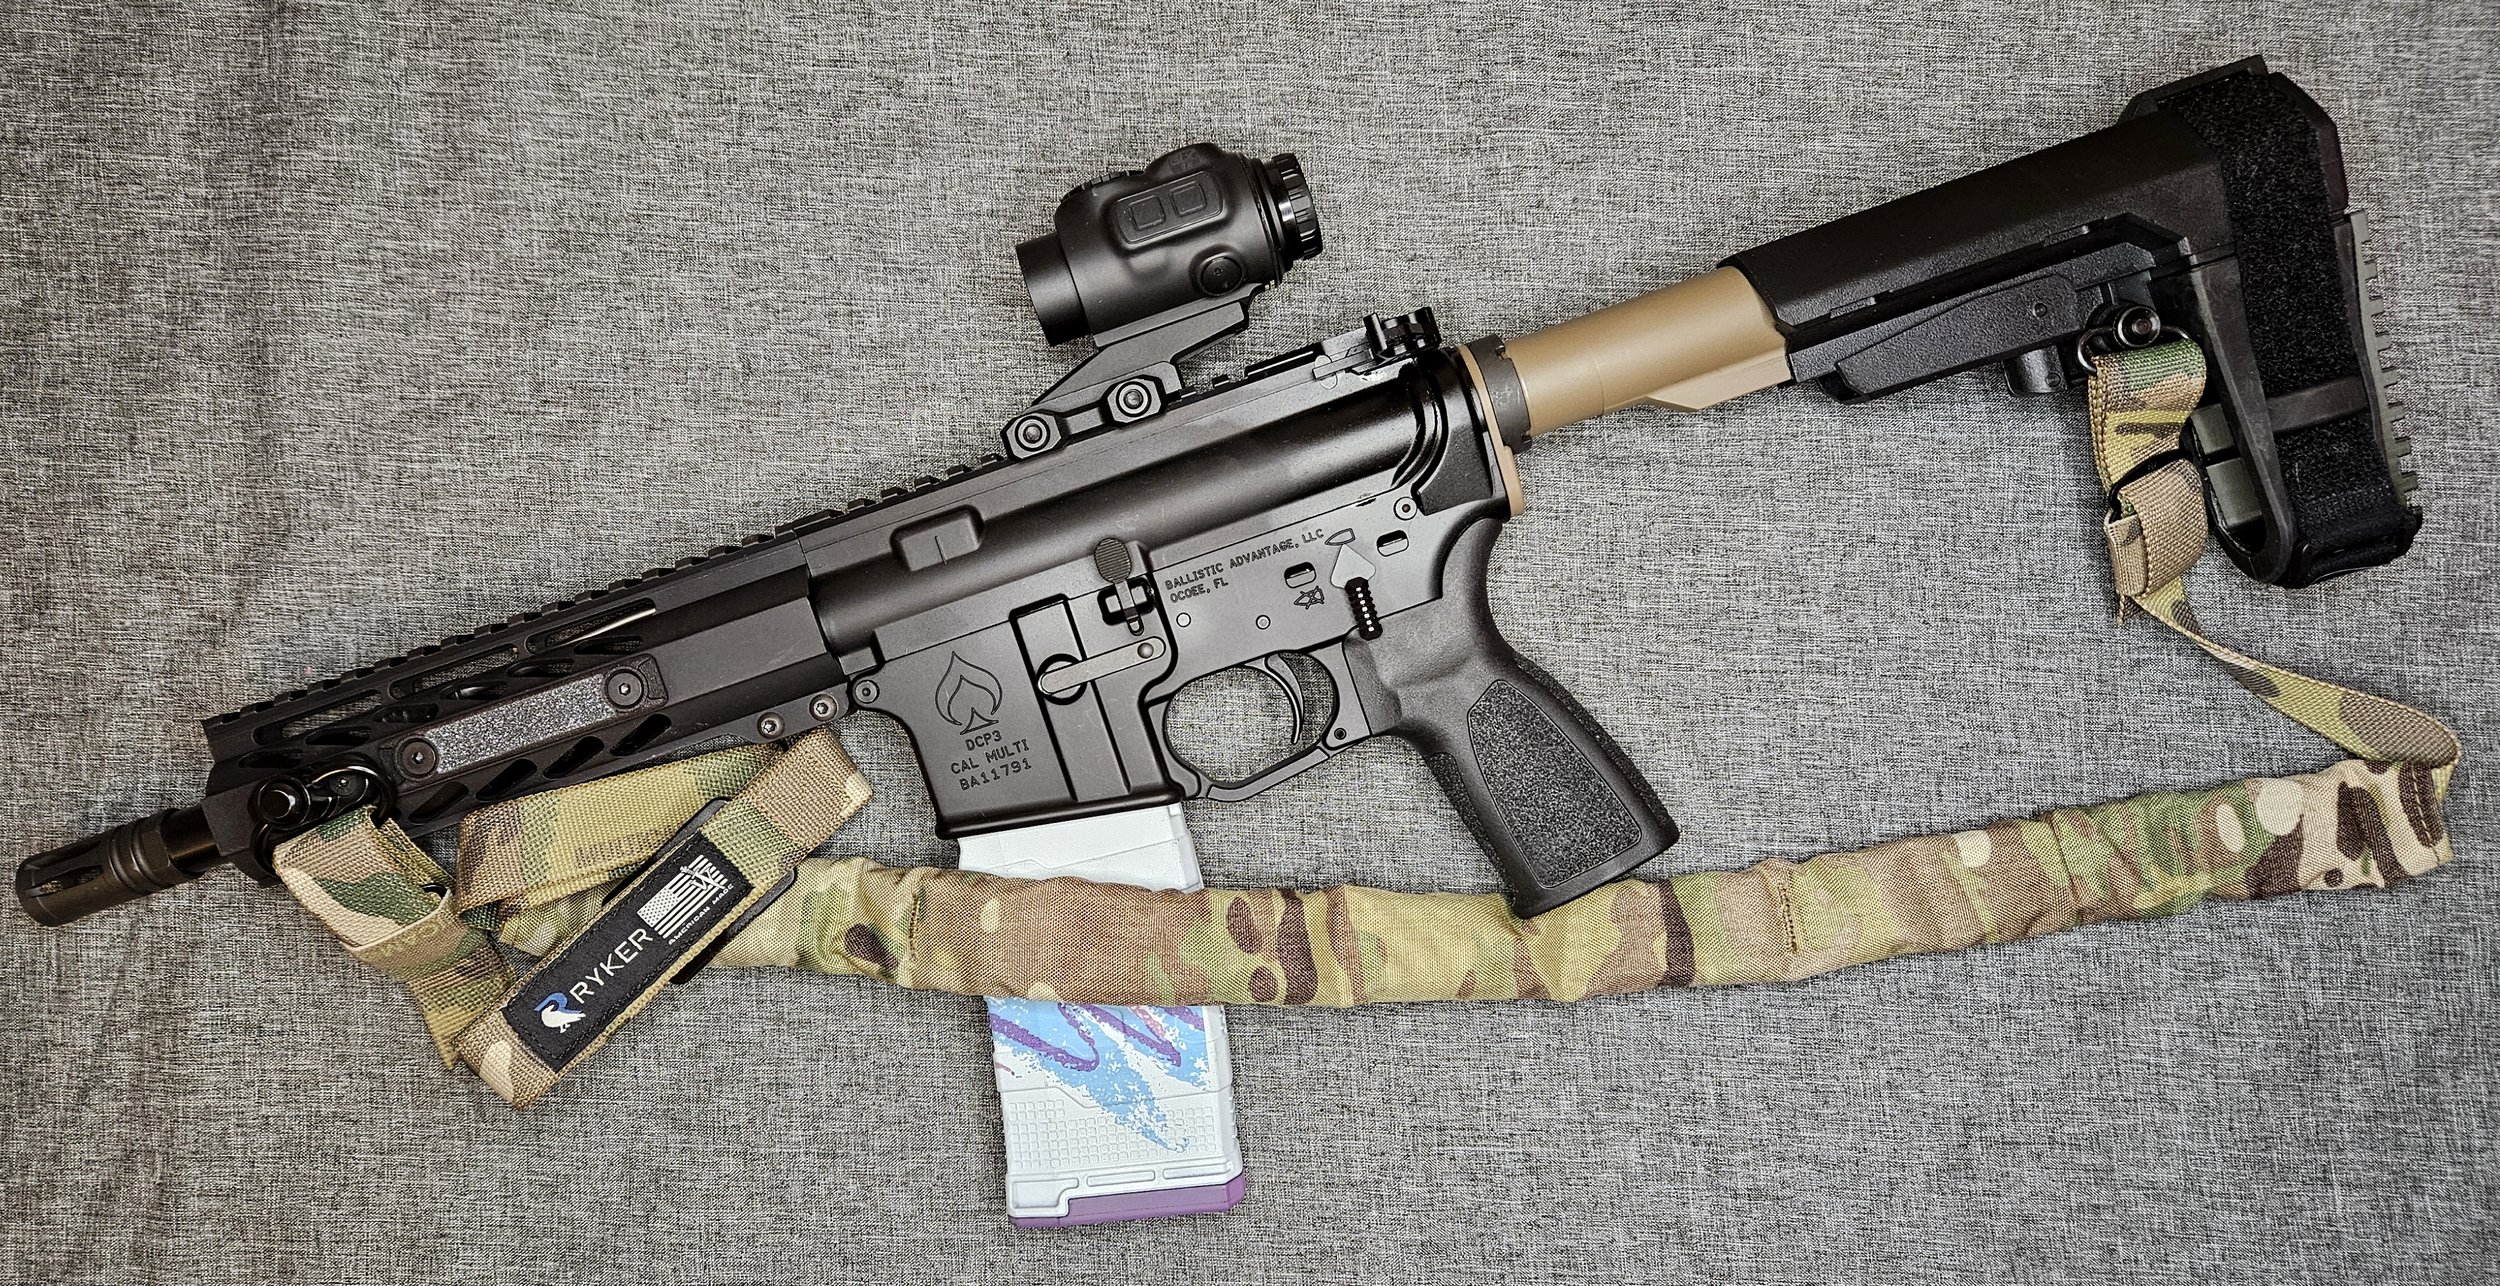
  There are only a few other things about that Monolith that need to be shared. First up is the trigger. It is a flat mil-spec trigger. It is slightly better than a standard mil-spec trigger. Its pull weight is about 5.5 pounds on this rifle and feels like it has a little less creep. Global Ordnance also spec’d out a B5 grip. The grip has good texture and matches the rifle nicely. Lastly, the Monolith only weighs 5.82 pounds out of the box! With a Primary Arms 1-10x28 and a full magazine, it only weighs 7.8 pounds. So the whole package is pretty light.

  The Monolith is a great rifle, but it does have some quirks. It comes with an extra recoil spring assembly. The extra is supposed to be for suppressor use. However, when I ran the Monolith with a suppressor and the “suppressor” spring, I had 2 short strokes and a failure to lock the bolt back on an empty magazine. This was in about 3 magazines. I switched back to the normal spring and it worked great, even with the suppressor. I ran around 200 rounds suppressed, after switching the recoil spring back to the original one. Other than those failures, the Monolith ran like a champ. Another problem I ran into was that I could not pull the charging handle back far enough to charge the rifle. After inspection, the charging handle carriage was binding where it goes through the receiver. I smoothed it out with a round file and have not had any problems since. The manufacturer has now since put a chamfer on the part, eliminating that problem. Lastly, the stock can flex a little if you really pull the rifle back into your shoulder. I never noticed it while shooting the Monolith, only when I was dry firing it. 

  Now to the good stuff. I really like how the Monolith shoots. The lightweight really makes it a joy to use. You can move from target to target quickly or get reasonable accuracy out of it. It averaged from 1.4 inches to 2 inches at 100 yards with almost any ammunition, from 55 grain up to the 75 grain. Global Ordnance supplied some 69 grain match ammo for the review, it grouped about 1.6 inches. I also really appreciated being able to drop the bolt by just pushing the dust cover down. The folding charging handle also works well as a kick stand so your hot suppressor does not touch the table and melt stuff. I also appreciated the folding stock, it is nice to have folding abilities in a rifle. Probably my favorite aspect of the Monolith is the one piece barrel assembly. Not only does it eliminate parts from the rifle, it is just a cool piece of engineering. 

  To improve the Monolith, I did add a few parts. Because I did not care for the trigger, I installed a flat Geissele SSP trigger courtesy of Primary Arms. This made a drastic improvement in how it feels and shoots. I am just not a fan of mil-spec triggers. During the testing, I also had a Holosun red dot mounted on it at first. Mainly it ran the Primary Arms SLx 1-10x28 with their Nova fiber dot reticle. This was a great choice for the Monolith. It let me do accuracy testing at 100 yards and do fast work up close. The Monolith was fine by itself, I just like better triggers. Plus, you can’t really do much without some sort of sight.

  If you are looking for an AR that is not an AR, but better, the Global Ordnance Monolith might be it. This rifle has all the features anyone could want. Plus the monolithic barrel assembly is just a great improvement. I enjoy the lightweight and ambi features of the Monolith too. Definitely go take a look at the Monolith, especially if you are looking for something different than your standard AR15.

Firearms Insider Reviews - Key Points

Claim to Fame:

Advanced AR15 style rifle

Target Market:

Anyone wanting an ARish rifle with the features mentioned in the review

Features, Benefits, and Specifications of this product:

  • Caliber: 5.56x45mm

  • Bufferless recoil system

  • Monolithic 1 piece barrel

  • Barrel Length: 16.1"

  • Barrel Material: 41v50 Black Nitride

  • Barrel Twist: 1:7

  • Gas Length: Mid Length with 45 degree port

  • Muzzle Device: Integrated Dead Air KeyMo 2-Port Brake

  • Heavy Duty AR10 size bolt

  • Safety: Ambidextrous Manual Safety

  • Weight: 5lb 14oz

  • Overall Length: 24.5" - 31.25"

  • Charging Handle: Forward Side Folding - swappable from left to right

  • Grip: B5 Systems P-Grip

  • Trigger: Flat AR-15 Trigger

  • Stock: F5 Modular Adjustable Folding Stock

  • Bolt Release : Ambidextrous with EP Cover Drop

  • Magazine Release : Ambidextrous

What other aesthetic options or finishes are available?

16” A2

12.5” Keymo Pistol 

10.5” Pistol A2   

12.5” Pistol w/Brace  

What others are saying?:

5 stars at GlobalOrdnance.com

I like that you did away with the two things I dislike about the ar 15. The buffer tube and the charging handle. I like the side charging handle and no buffer tube.

Link to other reviews:

American Rifleman  

RecoilWeb  

Price point:

MSRP = $1234.99

Retail = Same

I need it now! Availability:

Global Ordnance, Primary Arms, or your local gun store

Our Rating:

Pros:

  • One piece barrel assembly 

  • 308 size bolt for added strength 

  • No buffer tube

  • Lightweight 

  • Ambi controls

  • Built in folding stock

Cons:

  • Harder to charge compared to standard AR

  • Charging handle locked up (current models have been fixed) 

  • Stock flexes a little bit

Score: 8.00 Great

Traser P99 A Tactical Carbon

Traser P99 A Tactical

Watch Review

  A watch review was not on my radar. Then, Traser Watch sent me a press release. So I asked if I could review one of their new Tactical watches. Traser kindly sent me the new P99 A Tactical Carbon. It has tritium dials, an automatic Swiss movement, and a carbon fiber polymer case. 

  One might ask what a watch has to do with firearms, outdoors, or anything else we review? To start with, who doesn’t need to tell time? How are you supposed to know what time to meet up for the boogaloo, when to testify on the gun control hearing at the capitol, or more importantly, when to be home from the range for dinner. Either way, having a tacticool watch that winds itself should be reason enough. But mainly, if you are into the stuff we do here, there is a good chance that you are into quality watches also. After all, it is another piece of gear that helps you in your day to day life.

  The Traser P99 looks exactly like you would expect from a tactical watch. It has an outside bezel with corresponding 5 minute marks laid out around it. So every 5, 10, 15 minutes and so on. Inside the bezel it also has these same minute marks in a smaller font size. On the watch face, it has tritium vials at every hour mark. With the 12 o’clock mark being orange in color instead of green like all the others. Of course there are white minute marks going around the dial as well. Inside those are numbers 13-24, so if you use military time, Traser has you covered for that too. In the 6 - 9 o’clock space is also a date reading. This “date” shows a bunch of the day's numbers, but has a red chevron (arrow) pointing to the today date. The hour and minute hands are painted red but also have a green tritium insert in them to see them in darkness. The second hand has a little orange tritium insert in it. Besides just tritium inserts, the P99 also uses Super LumiNova luminescence, or glow in the dark. For the luminescence glow, there is a complete circle around the watch face along with the 15, 30 , and 45 minutes marks on the bezel. Covering all that is an anti-glare sapphire crystal. The P99 watch face is nicely designed and easy to read, day or night.

  Traser’s first watch was made in 1989. This watch was made for the US Army and was the first ever tritium watch. The first watch was made possible because of a company called Trigalight. They were the first to mainstream the manufacturing process of tritium into little vials, down to 0.3mm in size. These vials can be installed into anything that you want to glow. Trigalight probably produces tritium vials for most, if not all the manufacturers in the firearm space. Trigalight and Traser are sister companies under the MB Microtec umbrella, which helps explain the P99 watch from Traser.

Luminescent glow and tritium

Tritium only

  For the P99 A, Traser uses a Swiss automatic movement. The “A” after the P99 stands for “automatic”, if you have not picked up on that yet. The automatic movement winds the watch from movement in your wrist. So unlike solar watches, you don’t need light for it to keep time. It does have a power reserve of about 2 days, but also can be manually wound using the crown. I only wear a watch during the day and take it off at night. I have not had to ever wind the watch manually. One flaw with automatic winding watches is that they have a specification for how accurately they keep time. The Traser P99’s spec is plus or minus 30 seconds a day, with the best automatic watches being plus or minus 15 seconds a day. The P99’s movement is fully mechanical, so no batteries are ever needed.

  Surrounding the automatic movement is a carbon fiber reinforced polymer. This case also has a steel container to house the automatic movement of the watch. This carbon polymer case is what gives the watch its looks. It also has flake style carbon on the watch face itself. I am pretty hard on watches and I have not even marred the P99’s case. Hooked to the case is a choice of 3 different watch straps. You can either get a fabric NATO strap in grey camo or black, with the other option being a rubber strap. I opted for the camo NATO strap and couldn’t be happier. 

  The Traser P99 A has a few other features. The mechanical movement can be seen from the back of the watch, through a large clear window. All this really does is make it look cool and I am okay with that. The P99 A also has a water resistance rating of 20 ATM which is the equivalent of 200 meters under water. Helping to make this water resistance specification is a “screw down crown”. What is a “crown”? Well, the crown is the part of the watch that winds it, or adjusts the date and time. On the P99, to adjust the date or time, you must first unscrew the crown, which is the little dial thing on the side of the watch. Then just pull it out to the correct step and adjust what is needed. Push it back in, screw the crown down, and you will be back to getting wet and telling time, in no time.

  The bezel, or the outer ring of the watch face, on the P99 rotates. It rotates with a click for every minute. Why you might ask? It is so you can spin it to match up with the minute hand. Then you will be able to tell the elapsed time. So say you wanted to train pistol draw strokes for 20 minutes. Just turn the dial to the current minute hands position, then when the minute hand gets to the 20 on the bezel number, you know you have done 20 minutes worth. It is pretty easy and useful for certain things.

  I have worn the Traser P99 A for months now. It is not a small watch by any means, but it isn’t huge either. I like the size. There are a few aspects of the P99 that I do not care for, but they are minor. One is that this particular watch gains about 2-2.5 minutes a week. It is within the Swiss movement's specifications. I just turn it back 5 minutes every two weeks. Since it gains time, you will always be early for dinner. My only other complaint is that the bezel needs a stronger spring, or whatever is used in it for the detent positions. It moves sometimes. Like I mentioned, I am pretty hard on watches because I work with my hands, so the bezel is getting bumped and moved. On a positive note, I have yet to have scratched the crystal or marred up the watch case. A true testament on how rugged this watch actually is. I shoot with the watch on also. I have destroyed other watches while doing this, both analog and digital. The P99 has withstood everything I threw at it. The tritium in the watch is super bright. I really enjoy being able to tell time in dimly lit rooms easily because of this. The Traser P99 A Tactical has been a great watch

  If you happen to be looking for a “tactical” style watch that never needs batteries, the Traser P99 A might be for you. Its auto winding Swiss movement is nice. The tritium inserts are what really make this watch shine. They are super bright and placed just about everywhere on the watch. This watch is also almost indestructible. Maybe the most important aspect is that the Traser P99 A Tactical Carbon looks great. Go check it out, along with the other Traser products at www.traser.com

Firearms Insider Reviews - Key Points

Claim to Fame:

Tritium watch with automatic winding Swiss movement 

Target Market:

Anyone wanting an analog tactical watch that never needs winding

Features, Benefits, and Specifications of this product:

  • Trigalight self-luminous technology on the dial, hands and underneath the Traser logo

  • Luminescent glass seal

  • Trigalight cross insert in bezel, Super-LumiNova (SLN) marking on bezel

  • Luminescent ring on crown

  • Movement: Swiss made automatic

  • Size: Ø 46mm

  • Glass: Anti-reflective sapphire

  • Carbon fiber-reinforced polymer double case with internal steel container

  • Screwed-down crown

  • Transparent case back

  • Carbon fiber back face

  • Date window at 7.5 o’clock

  • Strap: Textile NATO strap and rubber strap

  • Water resistance: 20 atm / 20 bar

What other aesthetic options or finishes are available?

Non Automatic, Different bands

What others are saying?:

Nothing found as of publishing

Link to other reviews:

A Blog to WATCH   

Price point:

MSRP = $1165.00

Retail = Same

I need it now! Availability:

Traser USA is your best bet

Our Rating:

Pros:

  • Tritium is bright! 

  • Luminescent dial

  • Carbon fiber case construction 

  • Automatic movement 

  • Water resistance 

Cons:

  • Gains time, so time needs reset every couple of weeks 

  • Bezel doesn’t stay in one place

  • Price

Score: 8.50 Great 

ZRODelta ZRO FKS-9

ZRO FKS-9 Review

  When I first heard about the Zro Delta FKS-9, I was intrigued. Mainly because it is a Gen3 Glock 19 clone for $400. The name also made me laugh “Zro Fks 9”, you get the point. The FKS-9 also had “upgrades” that should make it better than a G19. Which is probably why you are here reading this. So let’s get started.

  As mentioned, the FKS-9 is essentially a G19. It is the same size and uses the same parts, or at least Glock gen 3 parts. What that means to you is that Gen 3 Glock triggers, sights, barrels, slides, and magazines will work with the FKS-9. The only part that is not Gen 3 compatible is the reversible Gen 4 magazine release button. In my experience, it will also fit in my G19 and G17 Holsters.

  The frame on the ZRO FKS-9 is where the real differences are. To start with, it has excellent texture on the pistol grip. It is not too harsh, but still gives a good grip when firing. There are no interchangeable backstraps with this one. All you get is a molded in curved style. This grip seems to fit various size hands comfortably, except maybe some smaller ones. The extended beavertail and double undercut trigger guard help the FKS-9 to fit those larger hands without much trouble or slide bite. Instead of a picatinny rail at the front, Zro Delta decided to go with the standard Glock light rail. This is fine since there are plenty of lights out there that will fit it. My favorite part of the frame is the “Control Ledges” that are above the front of the trigger guard. These ledges do two things: they give you a reference point to index your trigger finger when not shooting, and they give you a spot to rest your support hand thumb, thus helping to dampen muzzle flip. These ledges actually have a textured ledge to them. This ledge extends out from the frame about 1/16th of an inch to give you some real bite with your thumbs. The magwell is ever so slightly beveled to help with reloads. Lastly, the frame also has a 18 degree grip angle instead of the Glock's 22 degree angle. This grip angle makes it point better for most people. 

  Up top of the ZRO FKS-9 is a nice looking slide. It is made from 416 stainless steel and then  black nitride plated. The slide has no identifying marks on it. Instead, the 4 inch match grade barrel is marked with the ZRO logo. There are front and rear angled slide serrations. These are cut nicely and give it a good grip, even with gloved or wet hands. On top sits a set of 3-dot steel sights. These sights are usable, even if they are pretty plain. Inside the slide sits a one piece style recoil spring assembly that rides on a stainless rod. The rest of the parts are just normal gen 3 slide parts. All this makes the FKS-9 shoot pretty accurately.

One of the actual failures

  Now it is time for my relationship with the ZRO FKS-9. The pistol doesn’t live up to its name. Yes, I really like the grip angle, even though the pistol felt a little bit snappy to me. It also carries nicely in a holster. The texture didn’t kill my skin while carrying, a bonus I would say. Now the bad. I had a lot of stove pipe failures, like 2 in the first 50 rounds, then about 1 every 150 rounds past that for a total of 6 in the 750 rounds I shot. I even used 4 different types of magazines on separate trips out, as well as various types and brands of ammunition. The front sight also came loose at the 280 round mark. Luckily I noticed it before it went flying downrange. I then loctited it in and didn’t have any problems with it coming loose after that. The trigger pull weight also came in at 6.25 pounds after breaking it in. I know it is a Glock trigger, but I was hoping for the stated 5.5 pounds. I would have also liked the base model to come with an optic cut and a few more magazines. The FKS-9 didn’t live up to the quality that I expected from Zro Delta.

  The best thing about the Zro Delta FKS-9 is its name. And from the problems I had, maybe they don’t give any. The pistol has some good things going for it, I just think they need to refine their quality control a bit. Then the ZRO FKS-9 might be something that will compare to the pistol it copies. Either way, if you want to check out the ZRO FKS-9, you can head over to Zro Delta and take a look at it.

Firearms Insider Reviews - Key Points

Claim to Fame:

Decently priced G19 clone with 1911 grip angle

Target Market:

Those wanting a Glock compatible G19 size pistol for less than the price of a Glock

Features, Benefits, and Specifications of this product:

  • Caliber: 9x19mm

  • Advanced Polymer Frame and Handle

  • Reversible Ambidextrous Magazine Release

  • Improved 18-degree Grip Angle

  • 416 Stainless Steel slide

  • 4140 Precision Match Barrel, 4”

  • 15 Round Capacity,  1 Magpul magazine included

  • Sights: White Dot Rear/Front

  • Trigger Pull: 5.5lb

  • Width: 1.25”

  • Weight: 21.5 oz

  • Enhanced Beavertail

  • Double-undercut Trigger Guard

  • Control Ledge above trigger guard

  • Glock® Gen3 compatible

  • Made in USA

What other aesthetic options or finishes are available?

RMR cut or Plate System

What others are saying?:

Not much found as of publishing

Link to other reviews:

Athlon Outdoors    

RTT: Guns & Gear on YouTube

Price point:

MSRP = $399.99

Retail = $350.00

I need it now! Availability:

ZRODelta or your local gun shop

Our Rating:

Pros:

  • The NAME

  • Grip texture

  • Uses Gen 3 Glock parts

  • Magazine well

  • Undercut Trigger Guard

  • Beavertail

Cons:

  • Trigger pull is a little stiff

  • Random stovepipe failures 

  • Base option should come with RMR cut

  • Front sight came loose

Score: 6.00 Okay

Walker Defense Dark Matter BCG

Walker Defense Dark Matter

High-Polish DLC BCG Review

  The heart of an AR15 is the Bolt Carrier Group or BCG. A quality BCG can make your rifle perform like a champion. A mil-spec BCG might work, but will not perform as well, especially if you are trying to get the best performance out of it. Walker Defense Research has released their Dark Matter Bolt Carrier Group. This highly polished, fitted, and DLC coated BCG is of the utmost quality.

  When looking for a Bolt Carrier Group, either to replace one or for a new build, there are things to consider. Do you want cheap, or are you looking for top quality that will last forever? The Walker Defense Dark Matter BCG is in the top quality group. To start with, it is a M16 style full auto carrier. So if you are fortunate to have a full auto M16, M4, etc, it will work with that. More important is the fact that the M16 carrier has the full mass, which allows it to run more smoothly, at least in my opinion. This Dark Matter carrier is also made from 8620 tool steel for a lifetime of use. 

  The Dark Matter BCG has a bunch of hi-end specifications. Some of these I will describe more in depth later. This BCG is for standard calibers and for use in direct impingement guns. These include 5.56/.223/300 blk, etc. It weighs 11-⅝ ounces and is made to true mil-spec dimensions. On the front end it has a C158 bolt that is magnetic particle inspected and high pressure tested. The 4130 gas key is properly staked using Optimized Carrier Key Screws (OCKS). These screws are deeply knurled to allow the staking to dig in, making them almost impossible to come loose. Lastly, the Dark matter BCG is DLC coated.

  Walker Defense is all about small batch quality. Here is what they have to say about the Dark Matter BCG: “We’ve always leaned into our advantage as a company specializing in small-batch production, but we’re taking it further. Those extra touches of quality add up and give us the ability to do things that larger companies just can’t. A few quick tangible examples of this:

Each carrier is matched by hand to each bolt and cam pin to prevent tolerance stacking and to ensure ideal, consistent fitment as the bolt cams back and forth.

We also pair each bolt with its firing pin to confirm adequate protrusion for reliable primer ignition.

Using OCKS screws for ultra-aggressive staking of the gas key, so it won’t loosen at high round counts”

Those are just a few things Walker Defense does to give you the best BCG around.

  DLC, or Diamond-Like Carbon coatings have been around for a while, but the Dark Matter BCG takes it to a new level. DLC coatings by themselves are extremely hard, corrosion and wear-resistant, and very slick, which gives them low coefficients of friction and superior dry lubricity. Walker Defense takes this up a notch by aggressively polishing the bare metal, before it is coated. As with most machined parts, a BCG is only as good as its base metal. This polishing is a very labor intensive process which makes the Dark Matter BCG super slick and mirror-like shiny. Then after a high quality dark black DLC coating is applied, they polish the DLC coated BCG again. This makes the BCG even more slick (and also hard to take pictures of because of the mirror finish it produces). By polishing the BCG before and after coating, you get an extremely smooth surface that carbon has a hard time sticking to. Cleanup on the Dark matter BCG is super easy. One can literally just wipe it off with a rag. Carbon just doesn’t stick to this BCG.

  I am using the Dark Matter BCG in a 300 blackout AR pistol. This pistol ran suppressed for around 60% of the review. Why does this matter? Because the pistol gets a lot dirtier. The upper on this pistol is nothing special, just your off the shelf AR upper receiver. Before installing the Dark Matter BCG, I was running a Mil-Spec BCG. After I installed the Dark Matter BCG I could tell a smoothness difference. Not just in how the gun cycles under use, but also when hand cycling the action. The AR pistol is just way more pleasant to shoot now. Another thing I noticed was that the brass ejection was more consistent than with the mil-spec BCG. I attribute this to the action cycling smoother. After around 800 rounds, I can’t even really notice any wear on the Dark Matter BCG, a testament to that fantastic polished DLC coating. 

  The Walker Defense Dark Matter BCG is slick, pun intended. This BCG is of the utmost quality. It has all the standard features you would want in a high quality BCG: MPI and HPT tested, DLC coated, quality base metals, and true mil-spec dimensions. That does not even count the “extras” Walker Defense puts into these. One would be hard pressed to find a better, or smoother BCG. The price on these is very reasonable for what you get, definitely a high value to price ratio. If you are looking for the slickest, highest quality BCG around, definitely go look at the Dark Matter High Polished BCG from Walker Defense. These are literally super slick.

Firearms Insider Reviews - Key Points

Claim to Fame:

Super slick, high quality bolt carrier group that is easy to clean

Target Market:

Those wanting a superior BCG

Features, Benefits, and Specifications of this product:

  • Coating: Highly-Polished DLC

  • Compatibility: M16/ M4 / AR-15 Using Direct Gas Impingement (not for use in piston guns)

  • Calibers: 5.56x45mm NATO / .223 Remington / .300 AAC Blackout

  • Profile: Full Auto Style Carrier w/ Properly Staked Gas Key

  • Bolt: C158

  • Carrier: 8620 Tool Steel

  • Total Weight: 11 5/8 OZ.

  • True Mil-Spec dimensions

  • 4130 steel gas key

  • Staked with OCKS Screws

  • 4140 steel extractor and cam pin

  • Hard chrome ground 8740 steel firing pin

  • Magnetic particle inspected

  • High Pressure Tested (HPT)

  • Made in the USA

What other aesthetic options or finishes are available?

Nickel Boron, Titanium, & Flat Dark Earth DLC

What others are saying?:

Couldn’t find anything as of publishing

Link to other reviews:

VSO Gun Channel on YouTube   

Price point:

MSRP = $269.99

Retail = $229.49 with discount code “Insider15”

I need it now! Availability:

Walker Defense or Optics Planet

Our Rating:

Pros:

  • Super Slick mirror finish

  • Easy to clean

  • Deep black DLC coating

  • Properly staked OKCS screws

  • Polished before and after coating

  • M16 profile

Cons:

  • May not always be in stock

Score: 9.00 Amazing

Primary Arms GLx 1x MicroPrism


Primary Arms GLx 1x microprism review

  Prism optics have come a long way in the last 10 years. Primary Arms has been one of the leaders in prism designs. Their Microprisms were one of the first, if not the first, to be able to be used with magnifiers and back up iron sights. Primary Arms recently came out with their newest Microprism in their GLx line. This is the GLx 1x MicroPrism with the ACSS Cyclops reticle. The GLx microprism improves on the Primary Arms SLx line of microprisms, which were a fantastic product by themselves. 

  I have become a huge fan of 1x prism optics, the new GLx 1x microprism just enhances my fandom. The GLx 1x microprism has fantastic glass clarity and a decent size objective lens. It doesn’t weigh much. Primary Arms includes a bunch of different mounting options. They use readily available batteries that now load from the top. It also now uses push button controls as well as continuing to use their “Autolive” to turn the reticle on and off.

  Part of what makes the GLx 1x microprism nice, is the glass clarity. Looking through it, it is super clear. As is the reticle, at least after you adjust the diopter to your eye. I am not sure if the clarity is better because of the larger objective lens, or better glass. Both of which are better than Primary Arms’ SLx line of microprisms. Either way you get a super clear optic. Since this GLx is a prism, you will have eye relief. Primary Arms states an eye relief of 4.4 inches. But do not be fooled by this. These new microprisms can be used from about 1 inch out to a foot or more. I noticed that the new GLx seems to even have more eye relief than the SLx line, and it was amazing. Another thing people worry about with prism sights over red dots, is the viewing angle. For me, the reticle could still be seen at almost any angle, as long as you could see through the prism, you can make out a full reticle picture. When Primary Arms sent me the GLx prism, they also sent a “kill flash”, or anti-reflection device, with it. It just screws over the objective lens. It helps to block glare, both from looking through it, or looking at it. The kill flash is a nice little add-on if you like these things, or need them. 

  Primary Arms gave the GLx 1x microprism their ACSS Cyclops gen II reticle. The ACSS (Advanced Combined Sighting System) Cyclops is a horseshoe style etched reticle with a chevron, think triangle, in the middle. The round horseshoe part gives extremely fast target acquisition, especially for close up targets. It is also about the size of a 00 buck pattern at 25 yds. The chevron then takes over for precise aiming. You can also use the chevron like you would a red dot, if up close. The top point of the chevron is where you would zero your rifle. This point is also where you get pretty precise aiming by just putting the point on the target. The zero depends on what barrel length and caliber you are using (see picture). With a 16” 5.56 barrel, it would be 100 yds. The inner point of the chevron is now a bullet drop compensator. So with the same 16” barrel, this would be for 300 yds. Then the bottom part of the chevron would be 400 yds. The BDC is just a close estimation, since it also depends on ammunition type and the height at which the GLx is mounted. There is also range estimation built into the GLx microprism. It uses a 5’10” tall or 18” wide object for range estimation. When sighting in, the GLx uses 0.5 MOA clicks for both the windage and elevation adjustments. The clicks are very positive. The adjusting dial is recessed into the GLx’s housing so that the adjustments won’t be hit and knocked out of zero. It also makes for a smoother look. The 0.5 MOA adjustments are a great improvement over the SLx line that has 1 MOA adjustments. 

  Going along with the ACSS Cyclops reticle, the GLx also uses Primary Arms’ “Autolive”. The Autolive function turns the reticle off when not in use and then back on when the optic gets moved. It takes a miniscule amount of movement to turn it on. Of course it brings the reticle back on to the last brightness setting the optic was at. The Autolive gives the illumination part of the reticle about 10,000 hours of battery life, on a useful medium brightness setting. Because this is a prism optic, the reticle is also etched onto the glass. So even if your battery does die, you can still use the optic. 

  Part of why I like these new microprisms so much is that they can be used with a magnifier. Prism optics of the past used to not work with magnifiers. So now, if you were to want more magnification, you can just put a 3x or 5x magnifier behind the prism. Also, if you are old school, the GLx 1x prism will work with backup iron sights. Just another reason to like these new microprisms.

  The GLx 1x is called a microprism because it is not very large, imagine that. It is about the size of your typical rifle red dot. In fact, it is only 2.6 inches long and 1.8 inches wide at its widest point. It is fairly lightweight at 9.1 ounces, which is only 1.5 ounces more than its little brother the SLx. In the box with the GLx are different riser mounts. You can configure them for 8 different mounting height options, something you do not get with other prism sights on the market. If one of those 8 heights does not suit your needs, the GLx uses a standard mini-ACOG mounting profile. 

  Reticle brightness is controlled by up/down buttons on the left side. The GLx 1x microprism has 13 available brightness settings. The lowest 3 are night vision compatible with everything else going up to daylight bright in sunlight. The daylight bright is not as bright as Primary Arms’ NOVA reticle, or your typical red dot, but it is still bright enough to use. When you push the up button continually, and the brightness reaches max brightness, the reticle will flash. A pretty nice addition to easily see if you are maxed out on brightness. I do not have night vision, so I do not know if it does it at the minimum brightness level. One CR2032 battery is used for the illumination and is housed on top of the microprism. If you do not want to use the Autolive function, you can hold both buttons down to turn the optic completely off. Just push either up or down to bring it back online.

  I installed the GLx 1x microprism on a 300 blackout build. I am using both subsonic and supersonic rounds in this thing, so a 1x prism is the perfect sight option for me on this AR pistol. The GLx performed fantastic. I was able to ring steel at 200 yards with both subsonic and supersonic rounds. I just had to hold at the bottom of the horseshoe for the subs. The clear glass made seeing the targets easy. Since the GLx has an etched reticle, it plays nice with my astigmatism. I even ran some bill drills up close by just putting the horseshoe on the target, kind of like a circle-dot red dot. I am faster with just a red dot, but the microprism is not far behind in the speed category. 

  Going into this review, I already knew I liked 1x prism sights. The Primary Arms GLx 1x Microprism did not disappoint. The ACSS reticle gives the GLx something over just a dot and doughnut reticle. Eye relief is phenomenal. It has good light transmission. Let us not forget the Autolive function. Plus, all those mounting height options. The Primary Arms GLx 1x Microprism is definitely something you will want to check out.

Firearms Insider Reviews - Key Points

Claim to Fame:

Quality, streamlined 1x microprism optic

Target Market:

Anyone wanting a prism optic or those that have trouble with red dots

Features, Benefits, and Specifications of this product:

  • Battery Life: 10,001 - 25,000 Hours, 15,000 at setting “5”

  • Battery: CR2032

  • Click Value: 1/2 MOA

  • Exit Pupil Diameter: 18.8mm

  • Eye Relief: 4.4 in

  • Field View at 100yds: 74.8 ft.

  • Illuminated reticle

  • Length: 2.6 in.

  • Magnification: 1X

  • Mount Compatibility: Primary Arms MicroPrism, Trijicon Mini-ACOG

  • 8 mounting height options included

  • Night Vision Compatible: Yes

  • Objective Diameter: 20.5mm

  • ACSS CYCLOPS Red Reticle

  • Total Windage and Elevation Adjustment: 50 MOA

  • Weight: 9.1 oz.

What other aesthetic options or finishes are available?

GLx with Green Cyclops reticle

What others are saying?:

4 out of 5 stars from Stephen at Primaryarms.com

As expected

I expected these to top their predecessors. I didn't expect them to be a great deal better. They are much better! The larger diameter, the lack of illumination knob, and the clear glass make these a home run and more than adequate red dot replacer. Same reticle as the previous version which is great. I have a red and green model and found the illumination to be good. Crisp reticle and clear glass. Thanks PA.

Link to other reviews:

Beyond Seclusion on YouTube     

Price point:

MSRP = $299.99

Retail = Same, but check Primary Arms sale prices

I need it now! Availability:

Primary Arms

Our Rating:

Pros:

  • Essentially unlimited eye relief

  • 0.5 MOA adjustments

  • ACSS reticle

  • Autolive function

  • Battery Life

  • Etched reticle 

Cons:

  • Slightly heavier than the SLx line

  • Sometimes hard to make out BDC because chevron is small

Score: 8.50 Great

Primary Arms SLx 1-10x28 ACSS NOVA

Primary Arms

SLx 1-10x28 ACSS NOVA Review

  A few years ago, Primary Arms started making their NOVA fiber dot reticle. This bridged the gap between the Low Power Variable Optic (LPVO) and the red dot. Primary Arms has recently put the NOVA reticle into their SLx 1-10x28 optic. This is huge for those wanting more magnification over the SLx 1-6x24 NOVA. 

  The Primary Arms SLx 1-10x28 NOVA is packed with features. For starters, they increased the tube to 34mm from 30mm’s in the 1-6. This allows more light to get into the optic and back to your eye. This larger tube lets you see better at lower light levels as well as at the full 10x magnification. They also throw in flip up lens caps to keep the glass clean when not in use.

  Next on the feature list is the capped turrets. The turrets are a vital part in setting up your optic. Or at least getting it sighted in. I am not super thrilled with the turrets that Primary Arms uses on this LPVO. The clicks are fine and can be felt easily. My gripe is that they remind me of something that was used on scopes 20 years ago. They are small plastic knobs with a flat piece of metal that rotates to set your zero position. Then there is a tiny recess, in the threads, to line up your “zero” with. I was just hoping for something more like the SLx 1-6x24 NOVA. The caps that cover the turrets are nice. They have good texture to unscrew them. The windage knob cap also has storage for an extra 2032 battery. Yes, it comes with an extra battery already in the cap. On the left side of the LPVO is the brightness knob. It has 11 brightness settings from low light to burn your eyeballs out bright. However, it is not night vision compatible. The SLx 1-10 does not have Primary Arms’ Autolive. However, I did install their Autolive battery cap and it works like a charm.

  Eye relief for the SLx 1-10 LPVO is pretty good. Primary Arms states 3.2 - 3.5 inches, which seems about right. I did notice that the eyebox is pretty forgiving. I did not need to be exactly in the stated window to see through the optic clearly. The SLx also has a fast focus diopter so you can adjust the reticle to be crystal clear. Also, on this end of the optic is the magnification throw lever. Of course it goes from a true 1x all the way to 10x. The magnification adjustment is very smooth and rotates right at 180 degrees from 1x - 10x. Primary Arms also uses their removable throw lever. This one is about ¾ inch long. You can get different height ones from Primary Arms, as well as a fold down lever. 

  Now it is reticle time. The SLx 1-10x28 uses Primary Arms ACSS NOVA fiber wire reticle. This gives you a daylight bright red dot in the center of the reticle’s crosshairs. Basically a red LED travels through a fiber optic cable to the reticle, thus illuminating the reticle dot much brighter than a normal illuminated reticle. The center dot is roughly 0.6 MOA. Some people say the dot is too small to use it like a red dot. I am not one of those people, I love the Nova red dot. The rest of the ACSS NOVA reticle is a Mil based Second Focal Plane optic. So the reticle stays the same size throughout the magnification range. This also makes the Mil subtensions only accurate at the highest power, or 10x in this case. For elevation, there are 4 mil stadia lines below the center red dot. They are spaced 1 Mil apart, with ½ mil dots between them. These Mil stadia are wider at the top and progressively get narrower as you go down the reticle. This is so you can use them to range distance on an 18 inch wide target. On the horizontal stadia, there are 2 dots. These 2 dots represent approximately 3 mile per hour wind holds each. The crosshair taper can be used as a 3rd wind hold. The reticle is very useful for all kinds of things. I am a huge fan of the ACSS NOVA Mil reticle.

  When I first received the SLx 1-10x28, I had not received the rifle I was hoping to put it on. Since I had a “Range Day” competition coming up, I mounted it to my Primary Weapons piston AR15. Primary Arms had also sent their GLx 34 mm cantilever mount to use with the 1-10. It is a great mount by itself and puts the optic at just the right height for an AR. During the competition, I was able to use it like a red dot at 3-7 yard targets. Then I moved it up to about 3x to shoot some index cards at 50 yards. The optic performed great for that particular competition. And no, I didn’t win anything. The SLx 1-10 Nova now sits on a Global Ordnance Monolith, which was the rifle I was waiting to install it on. The 1-10 fits the rifle well and doesn’t add too much weight to it. After all, the SLx 1-10x28 Nova only weighs 19 ounces. I have also done a bunch of drills with the SLx on this rifle. The SLx worked great on it also. When I was shooting for groups, I had the SLx’s magnification turned up to 10x. On 10x the targets were easy to make out. The only problem I ran across was that at 10x, the scope is not as clear as at 1x. There was not a bunch of difference, but enough that I could notice. Even though it was noticeable to me, I could still make out 22 caliber holes at 100 yards easily enough. 

  I am a huge fan of the ACSS NOVA reticle in the SLx 1-10x28. Not only can you use this LPVO as a normal optic, it also can double as a red dot. You can even range targets with the Mil reticle. Pair it with the Primary Arms Autolive battery cap and you have an optic that is ready to go when you are. So if you are looking for that LPVO that has a little bit more magnification,  but still can be used fast and up close, give the Primary Arms SLx 1-10x28 ACSS NOVA a look.

Firearms Insider Reviews - Key Points

Claim to Fame:

Quality , inexpensive 1-10x optic with good features

Target Market:

Anyone wanting a quality LPVO at a fair price

Features, Benefits, and Specifications of this product:

  • Battery Type: CR2032 3V Lithium Coin

  • Click Value: 1/2 MOA

  • Exit Pupil Diameter: Low: 9mm / High: 2.8mm

  • Field View 100: Low: 110 ft / High: 10 ft

  • Focal Plane: Second Focal Plane

  • Illuminated MRAD NOVA fiber reticle, red color

  • Eye Relief: 3.2” - 3.5”

  • Length: 10.5 in.

  • Magnification: 1X - 10X

  • 34mm tube

  • Objective Diameter: 28mm

  • Total Elevation and Windage Adjustment: 40 MOA

  • Low Profile Capped Turrets

  • Warranty: Lifetime

  • Weight: 19.1 oz.

What other aesthetic options or finishes are available?

ACSS Raptor and ACSS Griffin reticles

What others are saying?:

5 out of 5 stars at PrimaryArms.com

Coyote Hunting 25-200 Yards

by Coyote Cam - 

  So, as we all know... the SLx 1-6x24 Nova has been the standard for the red dot bright LPVO with the Gen4. When I saw that they now make the exact same Nova illumination in the 1-10x28, it was time to pull the trigger on a 1-10x LPVO, but with any 1-10x I was a bit hesitant at first... but let me tell you, I am amazed at how clear this is out to 200 yards on 10x.

  Now... understand that this is for my dedicated Coyote setup out to 200 yards max, but also I have a heavy brush/timber area that I need to dial it back on and this 1x is running amazing.

  The red dot illumination helps when the reticle fades in the sun/tree line, which is why I wanted the Nova, but I needed more than 6x for target identification in dim light.

  If you are wanting something for the same reasons as I did, do not hesitate, the glass is actually super clear.

Link to other reviews:

Lynx Defense

Price point:

MSRP = $449.99

Retail = Same, but Primary Arms runs sales that take it below $400

I need it now! Availability:

Primary Arms or your local dealer

Our Rating: 

Pros:

  • Red Dot NOVA reticle

  • Mil lines for ranging

  • Lightweight for size

  • Battery storage in windage knob cover

  • Capped turrets

  • Decent throw lever

Cons:

  • Old school turrets with no real zero setting

  • Little fuzzy around the edges at 10x

Score: 8.00 Great

Ryker Sling 2.0

Ryker 2.0 Sling Review

  I had heard about the Ryker Grip and their gen 1 sling. So when I realized they had their Ryker gen 2 sling out, I went and watched their video on it. It impressed me enough to contact them. The Ryker gen 2 sling is a nice rifle retention system. 

  To start off with, the Ryker Sling 2.0 does the work of a basic 2 point sling. It has some differences that make it stand out. First off, it has a mil-spec flat elastic system sewn into it, like a bungee but way better. Don't worry, the elastic system is strong enough to hold the rifle tight. Definitely not like those single point bungees that everyone dislikes. Just set the Ryker sling up as you would your normal quick adjust sling. Some people like the QD's to be by the receiver, others like them out farther. I'm in the father out clan. Either way, the Ryker sling will work. To make things easier, it also comes with those QD's. All you need is a place to plug them in, so to speak. 

  If you caught it, the Ryker Sling 2.0 is a quick adjust 2 point sling. It has a loop that allows you to grab it and loosen or tighten it up quickly. This loop works well and lets me adjust the sling easily and quickly. It did take me a bit of time to get the length set just right, so that the quick adjust worked like I wanted it to. That is because of the flat elastic system inside the sling. I wanted some pressure pulling the gun back toward me when the sling was at full extension. With this sling length adjustment, it still allows me to tighten the rifle up to my chest and keep it from moving. Just in case I need to do something else, like pick up brass, load magazines, take notes, or just do not want the gun flopping around. 

  I put the Ryker sling through some drills to get a good feel for it. One thing I liked about the sling was that I could hold the rifle into my shoulder by just a little side pressure on the forearm. The flat elastic in the 2.0 held the rest. This set up works great for my shooting style. It makes for a very stable shooting platform, at least while standing. If you need a little more pressure, you can just move your elbow down into the sling to make it a little tighter yet. 

  Since I mentioned the flat elastic system, let me explain a little bit more on it. Ryker uses a 1” webbing as the main sling portion. Then they sew on the elastic portion. The flat elastic system consists of multiple layers of that mil-spec flat elastic, so you get the perfect sling tension. Over the top of the elastic, they sew on some material to make a sleeve. This allows the flat elastic to ride inside the sleeve, making it a little more comfortable when sitting around your neck. 

  Ryker also sent me one of their Ryker-Grips to try out with the 2.0 sling. The Ryker-Grip is an ergonomic grip that goes on the weak hand side of the rifle. It allows for better manipulation when driving the firearm from target to target. It also allows you to more easily pull the rifle into your shoulder pocket. Pair this with the 2.0 sling and you have an even more secure system than the sling itself. Everyone says the Ryker-Grip is a little weird at first, and I agree. But once you get used to it, it really does help with transitions. 

  I enjoyed my experience using the Ryker Sling 2.0. It does everything a quick adjust 2 point sling should do. Plus, it has the benefit of pulling the rifle into your shoulder. It also holds that rifle tight against your chest for administrative duties. If you are looking for a sling that does just a little bit more, check out the Ryker Sling 2.0.

Firearms Insider Reviews - Key Points

Claim to Fame:

2 point sling with a unique retention system

Target Market:

Anyone who needs a sling for their tactical rifle

Features, Benefits, and Specifications of this product:

  • Flat Elastic retention

  • Steel hardware

  • Quick adjust loop

  • QD’s included

  • Made in USA

What other aesthetic options or finishes are available?

Black, Black-Multi-Cam, and Traditional Multi-Cam

What others are saying?:

5/5 stars at Mitchell Defense   

Chris P. 

These slings are first rate. The positive retention and extra give, make this sling optimal for all uses.

Link to other reviews:

Ghost Tactical on YouTube 

Price point:

MSRP = $99.95

Retail = $99.95

I need it now! Availability:

Ryker USA or Mitchell Defense

Our Rating:

Pros:

  • Elastic retention system

  • Made and sourced in the USA

  • Steel hardware

  • Comes with QD swivels

Cons:

  • A little pricier than some other slings

Score: 8.50 Great

True Blue Suppressor Cleaner & Syrup

True Blue Cleaner Concentrate

and Suppressor Syrup Review

  I recently received some, new to me, True Blue Gun Lube products. Those products are True Blue’s Gun Cleaner Concentrate and Suppressor Syrup. I previously reviewed their Gun Oil and it performed great, so I was excited to see how this stuff performed.

  Both of these products are purposely built for suppressor cleaning. The Cleaner Concentrate and the Suppressor Syrup can also be used on regular firearms for cleaning and preventative maintenance.

  Let us start with the Cleaner Concentrate. As advertised, this is a water soluble cleaner and degreaser for firearms and suppressors. This is not one of those harsh chemical cleaners. Therefore it takes time to break down carbon fouling. True Blue says to soak the heavy carbonated parts for 2-3 hours to start, and increase soaking time if needed to break up the carbon fouling. 

  I used the Cleaner Concentrate on 2 different suppressors. One was sealed, and the other has removable parts. For the sealed suppressor, plug one end and fill it up with Cleaner Concentrate. True Blue states you can use it undiluted or diluted in a 5:1 ratio for best results. Since I was cleaning two suppressors, I diluted it to 5:1. I let both suppressors sit for around 3 hours. The carbon did not want to come off of the baffles on the one with removable parts. So I let both soak for another 12 hours. After sitting, the carbon gummed up and came off pretty easy with a wire brush. But it did not get all the carbon. So I proceeded to pour the mixture in my ultrasonic cleaner. I dumped all the parts in and turned it on for 30 minutes with heat. That took the rest of the carbon off of the baffles. My suggestion would be to use the Cleaner Concentrate in an ultrasonic cleaner for best results. However, I think soaking it for a full 24 hours would have done the same thing. For the sealed suppressor, I then just blew air through it to dry it out. From what I could see, it looked cleaner.

Dirty suppressor internals. Previously coated in Suppressor Syrup

  Now that we have the suppressors clean, it is time to use the Suppressor Syrup. The Suppressor Syrup is a thick, kind of sticky oil. Imagine that, they call it syrup for a reason. The Suppressor Syrup is meant to prevent carbon from sticking to metal parts. That means you can use it on adjustable gas blocks, choke tubes, muzzle brakes, suppressor threads, suppressor adapters, or anything else that might get carboned up. The one drawback to the Suppressor Syrup is that it has to be reapplied. When? Basically any time you do maintenance. So it really is not a big deal.

  The Suppressor Syrup worked well for me. After cleaning the suppressors, I followed the directions for application. On the sealed suppressor, I put 10 drops into the connection end of the can. One went on the threads since it is a screw on suppressor. Then I shot a couple rounds through it and looked for the end to be wet. It was, so I knew that enough had been applied. On the suppressor that can be taken apart, I put a thin layer on each baffle and reassembled it. Then off to the range I went. 

Same internals after 30 minute ultrasonic cleaner bath using Cleaner Concentrate. Wiped with rag

  Since I am not the sharpest tool, I didn't get any pictures of how dirty the baffles really were before I started this process. I proceeded to disassemble the suppressor again to take some pictures. It was not as dirty as before, but it also didn't have as many rounds through it. Or was it because of the Suppressor Syrup? Either way, I threw the baffles in the sonic cleaner for 30 minutes and then wiped them off. You can see a difference in the pictures. I do think the Suppressor Syrup made a difference in how easily the carbon came off. 

  The True Blue Cleaner and Syrup are a good option to help keep those suppressors clean. Especially if you want something safe. The Concentrate Cleaner also works on just about every aspect of a firearm. As for the Suppressor Syrup, it makes cleaning easier by helping to prevent carbon from sticking. Go check out True Blue Gun products and see if they have something that might help you. 

Firearms Insider Reviews - Key Points

Claim to Fame:

Easy to use suppressor cleaner and preventative 

Target Market:

Anyone who hates to clean suppressors

Features, Benefits, and Specifications of this product:

Cleaner:

  • Breaks down and removes carbon build up

  • Water Soluble

  • Safe on metals, plastics, neoprene, coatings used for firearms, suppressors, and knives

  • Ammonia free

  • Cleaner and Degreaser

Syrup:

  • Reduces carbon bonding

  • Eliminates Carbon Locking

  • Works on: 

    • Suppressor Internals

    • Compensators/Muzzle devices

    • Suppressor Barrel Mount

    • Modular Suppressor Threads

    • Shotgun Choke Tube

    • Threads

    • Adjustable gas blocks

    • Flashlight Lens

    • Any high carbon area

What other aesthetic options or finishes are available?

None

What others are saying?:

Syrup:

Karl S. - Palmetto State Armory, from Truebluegunlube.com  

What we found in our testing was that applying the Suppressor Syrup to the screw of an adjustable gas block allowed us to keep the adjustment screw usable over the life of our testing. Without the Suppressor Syrup this screw tends to become carbon locked within about 300 rounds and we are sometimes not able to free it.

Cleaner:

Luke H. - Integrity Elite Firearms, from Truebluegunlube.com   

We soaked a suppressor in the Cleaner Concentrate for several hours and successfully salvaged this one that was heavily saturated with carbon to the point where it resembled a barrel extension. This stuff works wonders.

Link to other reviews:

Kids Safe Foundation 

Syrup review   

Cleaner review 

Price point:

MSRP:

Syrup = $18.99 - $26.99    

Cleaner = $24.99 - $99.99   

Retail = Same

I need it now! Availability:

My Life @ Speed or your local gun shop

Our Rating:

Pros:

Cleaner:

  • Water Soluble

  • Safe for just about anything

Syrup:

  • Reduces Carbon build up

  • Makes Cleaning easier

  • Easy application

Cons:

Cleaner:

  • Not very aggressive at getting carbon off

  • Have to let sit for a bit

Syrup:

  • Must reapply periodically

Score: 

6.50 - Okay for the cleaner

8.00 - Great for the syrup

Favorite Link:  True Blue Gun Oil Review

Nightstick LGL-160-T

Nightstick LGL-160-T

Weapon Light Review

  Weapon lights are something that can be very useful on a long gun. They can light up a room, possibly disorient an intruder, or identify a target. Sometimes a more specialized weapon light is needed, that is where the Nightstick LGL-160-T comes in. The LGL-160-T is a version of Nightstick’s LGL-160 but uses a more focused beam. This allows the user to see farther into the night.

  Nightstick calls the LGL-160-T the “Turbo Long Gun Light”. The “Turbo” translates to a high candela output. They spec the 160-T at 100,000 candela and 800 lumens. Lumens translate into total light output, while Candela translates into focus. So the higher the candela, the more the light beam will be focused. A lower candela would produce a wide beam. This weapon light definitely has a very focused beam width. One advantage of the very focused beam is that you can identify targets out to much longer distances. Nightstick specifies the beam distance out to 632 meters. My experience is that most lights have about half of the usable range of their advertised specifications. This seems to be about right for the LGL-160-T, as I could make out landscape features at around 400 yds.

  One of the best features of the Nightstick weapon lights are that they come with everything needed to get them up and running. This is not just true for the LGL-160-T, but also other lights in the Nightstick line. Besides the light, the kit comes with a pressure switch, cable management, a normal and 45 degree picatinny mount, and batteries. 

  I do like the fact that the LGL-160-T comes with all that stuff. However, it does not use the standard “scout mount” hole spacing on the light itself. This means that if you want to mount it directly to an M-Lok or Keymod slot, you will need to get a separate mount from Nightstick. These mounts are inexpensive at around $20, so it shouldn’t be a big deal. They did supply me with their 45 degree M-Lok mount, which is what I used to mount the light. The 45 degree mount holds the light well and I really like where it places the light on the handguard. 

  There are two different ways to operate the LGL-160-T. One is by the standard push button tail switch. Just push it lightly to momentarily turn the light on. Or click it to turn the light on or off. This is how I use the light. However, the second way to use the light is with the supplied pressure switch tail cap. This pressure switch has both a pressure pad for momentary on/off and a push button clicky switch for on/off. The pressure switch and clicky work well. To aid with the pressure switch, Nightstick also includes their picatinny wire management clamp. I have used these clamps in the past and do like them. They definitely clean up how the cable runs along the handguard.

  Now, what everyone wants to know, how well does the LGL-160-T work? Let us just say it is bright! Do not let the 800 lumen rating scare you away. Look at the Candela. It is definitely bright and laser like. It also does an okay job of lighting up a room, if you can reflect the light off of something like a white ceiling or light colored floor. Where it really shines is illuminating targets out at farther distances.

  The Nightstick LGL-160-T is also dual fuel. So instead of the supplied CR213’s, you can use a rechargeable 18650. I really like the use of 18650’s. I tend to keep the CR123’s on hand for when rechargeable batteries are not an option, or I do not have a place to recharge batteries. This light will also run for 2 hours with the CR123’s, which is a pretty decent run time for a light of this type. 

  I mounted the LGL-160-T on a 12.5” AR style pistol. The light actually extends out over the muzzle brake. So every time I fire the AR it blasts the light head. The Nightstick has survived at least 500 or so 556 rounds to the face, or so one could say. I did not mount it that far forward just to abuse the light, I actually like the position of it. Being a pistol AR, it also does not have as much rail space as a full rifle length handguard. I was able to hit targets at 200 yds, at night, just using the light to illuminate those targets. This was with a red dot 1x optic, so no magnification. Yes, it is bright enough that a lot of light gets reflected back from the muzzle blast, but that is a problem with most lights. I was really pleased with the Nightstick weapon light’s performance.

  If you are looking for a weapon light to illuminate targets farther out than normal, the Nightstick LGL-160-T might work for you. It can be had for around $150 street price, which is a decent deal when you figure in all the extras you get. The LGL-160-T also took a pretty good blasting from the muzzle brake, so it should keep up with any abuse you might put it through. Take a look into the Nightstick LGL-160-T “turbo” long gun light. It might not be a close up light, but it can reach out and say “Hello.”

Firearms Insider Reviews - Key Points

Claim to Fame:

Long throw, high candela weapon mounted light

Target Market:

Anyone wanting a long throw weapon light

Features, Benefits, and Specifications of this product:

  • Lumens: 800

  • High Beam Distance (m): 632

  • Candela: 100,000

  • Drop Rating: 2 m

  • Water Rating: IP-67 Dustproof/Waterproof

  • Runtime: 2 hours

  • Switch Function: Tail Cap Switch, 6" Remote Pressure Switch - Momentary and Constant-On

  • Case Material: 6061-T6 Aluminum, Black Anodized

  • Power Source: 2 x CR123

  • Diameter: Bezel - 1.4 in, Body - 0.9 in

  • Length: 5.3 in

  • Weight: 6.3 oz

  • Package Contents: Weapon light with standard Picatinny mount w/thumb screw and tail cap switch, Remote pressure switch (6” cable), 45º offset Picatinny mount w/thumb screw, pressure switch rail mount, wire management clamp, (2) CR123 batteries, 2.5mm Allen wrench, Alcohol prep pad, Adhesive-backed Velcro mounting strip, Instruction manual

  • Warranty: Limited Lifetime Warranty

What other aesthetic options or finishes are available?

Standard output

What others are saying?:

Nothing found as of publishing

Link to other reviews:

https://gunmagwarehouse.com/blog/new-nightstick-lgl-160-turbo-ar-15-light-full-review/

Price point:

MSRP = $210

Retail = $132.95 at BH Photo

I need it now! Availability:

Optics Planet or BH Photo

Our Rating:

Pros:

  • Easy to identify targets at mid-range distances 

  • Good brightness

  • Pressure switch and cable management included

  • Dual fuel

  • Durable 

  • 2 hour runtime on CR123’s

Cons:

  • Doesn’t use the standard “scout” mount footprint 

Score: 7.50 Good

Favorite Link:  Nightstick LGL-170 Review   

Gnat Warfare Tactical Pig

Gnat Warfare

Airsoft RC Pig target Review

  If you want a fun training aid, that you may be able to do in your backyard, you need one of the Tactical Pig targets from Gnat Warfare. These are a radio controlled (RC) target that is intended to be used with airsoft guns for moving target practice. The “Pig” is a foam target that attaches to a 4 wheel drive RC car chassis. You will need a friend to drive while you shoot, but it is worth the enjoyment. We named our Tactical Pig Kyle, Gnat Warfare respectfully calls them “Kevin Bacon”, I will explain later.

  The Gnat Warfare Tactical Pig comes ready to go. All you need to do is charge the RC battery and install the supplied AA batteries into the controller. The Pig comes with a supplied charger to charge the RC battery. It charges relatively quickly, so you won’t have to wait long to start racing around the neighborhood. The instructions are awesome on how to hook everything up and pair the controller. These instructions have tons of pictures, so you hardly even need to be able to read. This process is so easy to get you up and going, that even a ten year old could do it.

  As for the size of the Pig, it is pretty standard for a 1/10th scale RC truck. The car part is approximately 13 inches wide and 18 inches long. The tires are 5 inches tall by 2.5 inches wide. This lends it to use in just about any terrain including backyards and shooting ranges. With the pig target, the total height is about 20 inches. When I first took the RC Pig out for a test spin, I was worried about it tipping over under sharp turns. Well, it did not. All it did was lift the front inside tire. 

  Kevin Bacon, as it is called, is essentially a small Javelina. This Javelina target measures about 22 inches long by 12 inches tall. It is made from 1 inch thick closed cell foam. This allows the airsoft pellets to stick into the target. If you are really close, they may go through, so as always, know your backstop. Especially since this is a moving target. Hitting the RC car part does not seem to affect it. The pellets just bounce off. The target just pushes into a “U” shaped piece on the RC’s frame. This makes changing it super easy. It also allows one to make their own targets and push them into the mount.

  Being this is an airsoft target, you will need an airsoft rifle or pistol to use it. I purchased a CO2 blowback one off of Amazon for $50 and it works well with the Tactical Pig. If you are looking for something to replicate the firearm you already use, I would look at what Umarex has to offer. Either way, this is not super expensive to get into, unless you want it to be.

  We call our Tactical Pig “Kyle”. Why? We had a neighbor once that was a motorcycle officer. He was on the short stature side, kind of like a javelina. So we thought the name was appropriate, lol. 

  Now that you know Kyle, we can talk about how he helps with training. Even though he is a small target, he does move, and move fast. These aspects help you train by shooting at moving targets. But not just moving in one direction like a lot of the moving targets we are used to. The advantage with Kyle is that he is unpredictable. You do not know what direction he will be moving, only the driver does. This makes him a vital training aid for real life scenarios, even if it is airsoft. If your airsoft pistol happens to be the same as your carry pistol, you can even do draw and fire practice. The training possibilities with the Gnat Warfare Tactical Pig are endless. 

  Everyone that shot, or drove, the Gnat Warfare Tactical Pig just loved it. It is so much fun to shoot at. Plus it gives you a fantastic training aid. If you have kids, they will love it also. Do yourself a favor and go check out “Kevin Bacon”, “Kyle”, or whatever else you want to call the Tactical RC Pig.

Firearms Insider Reviews - Key Points

Claim to Fame:

Radio Controlled airsoft target

Target Market:

Anyone who likes to have fun and shoot moving targets

Features, Benefits, and Specifications of this product:

  • Everything is included except the airsoft gun

    • RC frame

    • RC Battery and charger

    • Pig target

    • Controller

    • AA batteries for controller

  • Replaceable targets

  • Aggressive off-road tires

  • 4x4 RC suspension

  • Hobby-grade 7.2v NiMh battery included

  • 2.4Ghz radio extended-range control

What other aesthetic options or finishes are available?

None

What others are saying?:

5 out 5 stars at Gnatwarfare.com

Chris H.

I have had this pig target for almost 5 years. It has proven to be extremely well built and insanely fun to shoot. Our kids love airsoft and the large wheels, independent 4 wheel suspension and powerful motor lets us drive anywhere on our property, and it’s fast! The battery seems to last forever. I actually still have the original batteries in the controller. The foam pig Silhouette target has been hit 10s of thousands of times and is barely scratched. The BBs make a satisfying loud thud with each hit, which can be heard at long distance.

Link to other reviews:

Nothing found as of publishing

Price point:

MSRP = $299.00 

Retail = Same - Currently on sale for $99.99

I need it now! Availability:

Gnat Warfare or Umarex

Our Rating:

Pros:

  • FUN

  • Great training aid

  • Well made

  • 4 wheel drive

  • Large tires to go anywhere

  • Everything is included

Cons:

  • MSRP is a bit high

Score: 8.50 Great

Favorite Link:  Umarex Origin Review   

AR Build: A young woman's perspective

A young woman’s perspective on building an AR15

  So I pitched the idea of building an AR to my daughter and writing something about it. She thought it would be fun. I am not sure if she was humoring me or not. But either way, here we are with an awesome AR15, that she built herself. A special thank you goes out to all the great companies that helped sponsor this build, you can read about their parts later in the story. 

From Zoe:

 Putting together my AR was much more interactive than I expected it to be. In a way it was simple, yet complex. Many little pieces combine together like a delicate puzzle, but also a straightforward process to get to the final outcome. There were many different steps to complete to bring it all together. One of the most tedious was putting all the pins into place! Those slippery little rascals!

  When putting the AR together, all of the parts fit perfectly. Between all the different parts, and parts kits, almost everything needed was there, even little tools for some of the steps! Everything was beginner friendly (although having my father assisting me helped a ton). I enjoyed the experience and the reward was incredibly worth the time put into it. Building the AR also helped me feel closer to my dad and the big parts of his life. As a young woman, knowing that there are places that put these part kits together brought me a sense of safety. I am able to build something to provide protection for myself. Plus I got to learn the intimate process of building it, in turn making me a safer firearms owner and a safer young woman.

  Shooting it was a lovely experience. The parts used were all relatively light in mass and resulted in a very lightweight gun. Having to hold it for long periods was undemanding. Shooting it was like a well polished machine. There was very little recoil when firing the rifle. It also functioned flawlessly and did not jam. One thing that I did struggle with was pulling back the charging handle. Which can be a common issue as a woman, since our upper body strength is usually lower than are male counterparts. Charging the firearm is easier than other guns I have shot because of the larger size charging handle. All of the parts worked as expected and I was very satisfied with the experience as a whole. 

  I am so grateful to have had this opportunity. It provided me with important skills, and knowledge of firearms, that I did not have before building this AR. To any young woman who feels she needs confidence and a sense of security, I would highly recommend learning the safety and process of building a firearm. There are things out there to make life a little safer, and I believe this is one of those. 

Stay safe out there ladies.

Sponsored parts used in Zoe's AR build:

This AR15 is built for .223/5.56, so everything listed below is for that particle caliber rifle.

  When it comes to AR parts, there are many. We were fortunate to have some great sponsors who supplied top notch parts for this build. A lot of these are colorful, literally, but they are all high quality parts. 

  First up is the backbone of any AR build, the lower receiver. Our friends over at Foxtrot Mike Products sent one of their stripped lowers. These are billet receivers with a slightly enlarged trigger guard and a semi built-in magazine well. The Magazine well is 3D machined to give it a super smooth transition when loading magazines into the rifle. The Foxtrot Mike lower has a bunch of small added features that make it a little nicer than your run of the mill lower receiver. One of those is the ability to run a ball detent on the safety. That little detail makes a safety selector work so much smoother. 

  Since that lower receiver needs parts to make it function, ArmaSpec sent a stainless Lower Parts Kit (LPK) and their Stealth Recoil Spring. ArmaSpec’s LPK is one of my favorites. It comes with an ambi safety selector that does 45 and 90 degree throws. We did not use the ambi selector in this build, but I did install it elsewhere. All the springs and detents in the LPK are well made and I have no doubt that they will give the rifle years of use. The Stealth Recoil spring, that ArmaSpec manufactures, is a wonderful piece of equipment. Its complete unit replaces the conventional AR buffer and spring. It is called “Stealth” because it reduces the “twang” noise sometimes heard in normal AR’s. The Stealth Recoil system smooths out the cycling of the firearm and also reduces recoil, which was noticeable by how soft this AR shoots.

  If you want a barrel and need it to look fancy, Faxon Firearms has you covered. Since Zoe wanted something “pretty”, we went looking. Faxon has a match grade 16” Gunner series barrel that happens to come in “Chameleon” PVD. This color option fades from pink to purple, to blue, and then to gold. A perfect option for someone wanting color. It also looks amazing under the Robin Egg blue color scheme. Faxon also sent a gas tube and a 0.625” gas block to round out the package. This barrel is not only super accurate, but it is fairly lightweight too.

  When you are building an AR of this quality, you do not want to skimp on the Bolt Carrier Group (BCG). After all, this is what makes the firearm function. Walker Defense sent us one of their Nickel Boron BCG’s. Nickel Boron provides enhanced reliability, easier cleaning, and better lubricity. Walker’s BCG is super slick, literally, and has all the top tier options someone would want. It uses a properly hardened 9310 bolt, has properly staked OCKS screws, is magnetic particle inspected, uses a hard chrome firing pin, and has a M16 carrier profile. Walker Defense’s products are also 100% made in the USA with US components. 

  To finish out the build, and add a whole lot of color, Timber Creek sent an Enforcer build kit. These are fairly lightweight kits which work well when you are worried about the final weight of the rifle. Zoe opted for the Robin Egg Blue cerakote color version. The Enforcer kit comes with a ton of parts for your build. In this case, the Robin Egg Blue parts we used were the 15” handguard, pistol grip, charging handle, safety selector, buffer tube, end plate, port door, extended mag release, forward assist, and takedown pins. We also used the supplied muzzle brake, but it only comes in basic black. Timber Creek's Enforcer kit also comes with a 0.750 gas block, which we didn't use due to using a 0.625 barrel. We also did not use the trigger guard since we used a billet lower that has the trigger guard built in. 

  I want to mention two things about the Enforcer kit. First up is the Ultra Light M-Lok handguard. These handguards, by themselves, are stupid lightweight. They also have holes for QD swivels. Making it easier to add a sling. There are also plenty of M-Lok slots along the whole rail for adding whatever you want. The second thing I want to mention is the oversized charging handle. This handle is significantly larger than most. Zoe mentioned it made charging the rifle easier due to its size. I had never thought of this, but because you can get a good grip on it, it works better for those that have a smaller stature. 

  As we all know, you need a way of aiming a rifle. Since this AR is not being used for distance shooting, She opted for a red dot. Why? Because it is lighter than a 1x prism sight. Primary Arms Optics sent us one of their MD-25's with the 2 MOA dot. The Primary Arms MD-25 is a great red dot. It has a large window size and is pretty lightweight. Battery life is really good thanks to it having Primary Arms’ Autolive function. The Autolive turns the dot off after a few minutes of non use, and then turns it back on when it gets moved. The MD-25 is a great option for a defensive rifle. 

  Now you may have noticed that we are missing a few parts. We supplied the stripped upper receiver, stock, and trigger. Most stripped uppers are very similar and fairly cheap, so I just purchased one. When it comes to stocks, there are a lot of personal preferences. We just opted for a Hogue AR stock. They lock up tight, have a good feel, and are inexpensive. If you noticed, the LPK was not one that included a trigger. I had a TriggerTech Duty Trigger laying around. It is the 3.5lb version. This trigger is a really good option for someone that doesn't shoot a lot. Yes, it feels really good, but with the 3.5lb pull weight, it works well for beginners and seasoned pros alike. 

  Now my daughter has her own AR15. The experience of helping her build her own rifle will not be forgotten anytime soon. She has a life saving tool that will give her a lifetime of protection and enjoyment. 

PR Trigger

PR Trigger review

  PR Triggers has come out with a product that is just plain fun. It is their G model Pull Release Trigger for Glock Gen 3 style pistols. What is a Pull Release trigger you might ask? It is a trigger that fires when you pull the trigger, and when you release the trigger. So essentially you get two shots fired with every full press/release cycle of the trigger. 

  Since I already mentioned what the PR Trigger does, let us get into what it is. The G model trigger is a drop in trigger assembly for Glock gen 3 and Gen 4 style small frame pistols. For instance, a G19, G17, or equivalents. The PR kit contains a trigger, red colored backplate, a new striker plunger, and a new trigger housing. So it is a complete drop in swap from your original trigger. 

  Installation is pretty straightforward. Basically remove your old trigger group and install the PR one. The exception is the new striker plunger. To install the plunger, you will need to take the backplate off your slide. Then remove the old plunger. The PR’s new plunger has an arrow on it. This arrow must face the front of the pistol. Once installed, PR Triggers recommends installing the included red backplate. This is so that you can visually tell that this is the pistol with the pull/release trigger. If you do not feel comfortable doing this yourself, please have a gunsmith install the PR Trigger.

   Once installed, it is time to head to the range, or garbage pit, to do some shooting. On some pistols a break in period is needed. I dry fired mine a lot, so that may have helped. When I first tried the PR Trigger out, I only loaded up a few rounds to get the feel of the pull/release system. This seemed to work well. When I loaded up more, the trigger did not always want to fire. I was getting light primer strikes. I ran a bunch of different style ammunition through it, all with the same problem. So I took the PR Trigger home, took it out of the Lone Wolf Arms and installed it in a Polymer 80. When I returned to the range with it, I was still having problems. I contacted PR and they had me send the trigger back. Customer service was fantastic and promptly sent out a new one.

  Once the new PR Trigger was installed in the Polymer 80, I returned to the range. The new trigger was running much better. So much so that I could get through a full 30 round magazine without any problems. Every so often I will run into a problem if I am using iffy magazines or really cheap ammo. Good quality ammo seems to run decent.

  After using the PR Trigger in just a pistol, I proceeded to add something that takes it to a whole new level. Recover Tactical sent me out one of their 20/80 stabilizer kits for the Polymer 80. The Recover 20/80 is a folding chassis system for various pistols. It uses a clamshell design that just encapsulates the pistol. The Chassis easily installs and removes by just one screw. The price is right on Recover 20/80 also. They run $100. All I can say is that this little chassis system takes the PR Trigger up about 3 notches. You now have support to help control that second shot. The Recover 20/80 just makes the PR Trigger so much more fun to shoot.

  Besides the initial problems, I do have one complaint. If you pull the trigger back, firing a round, and want to stop shooting, you have to hold the trigger back while you unload the gun. This is very awkward. Try this, drop the mag and cycle the slide sometime, all while holding the trigger back. Did I mention pointing the pistol in a safe direction while doing this? It is not super easy. I do hear rumors that PR is making one with a switch so you can just flip it and release the trigger without the pistol firing. Besides this one complaint, The PR Trigger is still great fun.

  The PR Trigger is just plain fun. I know I have mentioned it before, but when you shoot this thing, it just puts a smile on your face. It is probably one of the closest things you can get, legally, to a machine pistol. Especially if you run it in some sort of chassis like the Recover Tactical one. You definitely need to experience it for yourself.

  If you are in the market for something different, check out the PR Trigger. It is well made and reasonably priced. Especially if you compare it to other triggers that are similar in function. It is not really practical, but sometimes fun overrules practicality. And the PR Trigger does that with flying colors. Go check out the G model over at PR Triggers.

Firearms Insider Reviews - Key Points

Claim to Fame:

Glock Trigger that fires on the pull and release of the trigger 

Target Market:

Anyone who likes to have fun

Features, Benefits, and Specifications of this product:

  • Drop in complete system

  • Fits gen 3 glocks and some copies

  • Fires on pull and release

  • Increased rate of fire

  • Easy install

  • ATF Compliant

  • Lifetime Warranty

What other aesthetic options or finishes are available?

None as of now

What others are saying?:

Nothing found as of publishing

Link to other reviews:

Chris from the 740 on YouTube   

Price point:

MSRP = $249.99

Retail = $199.99 at JSD Supply

I need it now! Availability:

PR Triggers or JSD Supply

Our Rating:

Pros:

  • Fires on pull and release of the trigger

  • ATF compliant 

  • Fun

  • Works even better with some sort of chassis system

  • Lifetime warranty

Cons:

  • First trigger sent didn’t seem to work with my setup

  • Doesn’t always fire depending on ammunition type

  • If trigger is pulled back and you don’t want to fire, you must unload the pistol

Score:  7.00 Good

Gideon Omega

Gideon Optics

Omega review

  I was looking for a new pistol mounted red dot to install on my Rost Martin. I knew I wanted a larger window size reflex sight for that pistol. So I did what any good reviewer would do and hit up the good people at Gideon Optics. Gideon had just what I was looking for in their Omega series. When they asked which version I wanted to review, I said the green dot only version. So a few weeks later I received it. That is where the story takes a twist.

  The Gideon Omega arrived at the perfect time. I had just received a lightweight 10/22 kit and it needed a lightweight dot. So even though I had intentions of mounting the Omega on the Rost Martin, it proceeded to get mounted on the 10/22 with the CP Firearms Dragonfly kit. The Omega was perfect for it. Its large window lets you see the dot quickly on this little rifle. Plus the Omega came with a pic rail adapter already installed, so all I had to do was tighten it on the rail. The Gideon Omega has an RMR footprint so it will fit on a ton of pistols cut for an RMR optic. Which is exactly what I originally had planned for the Omega.

  Gideon Optics has hit the ground hard with the Omega. It is their larger window RMR footprint reflex sight. The window size is 0.88 inches tall x 1.06 inches wide and round shaped with a flat on the bottom. I found it extremely easy to pick up the dot in the Omega. Probably because round objects draw the human eye to the center. Having an RMR footprint makes the Omega very versatile. There are so many mounting options for it, either direct or some sort of picatinny mount. Even offset style mounts can be had with RMR footprints.

  For this review, I asked for a green dot version of the Gideon Omega. It also can be had with a red dot, a red circle dot, or a green circle dot. The dot versions have a 3 moa sized dot and the circle dot versions have a 45 moa outer ring with a 3 moa dot inside the ring. I chose the 3 moa green dot because green is usually clearer for me. I also am not a fan of circle dot reticles on pistols, even though some people love them. The dot is bright enough to see on a hot summer day with zero clouds in the sky. The Omega has 10 brightness levels in case you need to turn the brightness down, 2 of those are night vision compatible. I am also a big fan of being able to set the brightness where I want it. I am also pleased with the clarity of the green dot. It just does not star out like a lot of red colored ones do for me. The dot was easy to pick up and super fast on that little lightweight 22.

  Auto on and off is a feature every new optic should have. The Gideon Omega has this auto on/off feature. Essentially, when you move the sight, it automatically turns back on to whatever brightness setting you have it set at. Then, after sensing zero movement, it turns off after 225 seconds, or just under 4 minutes. The Omega does have a twist to this auto on/off. If you leave the Omega sitting for 12 hours, it will turn off completely to save battery life. I have a love/hate relationship with this. Since I use it on a 22 rimfire rifle, this feature is great. But if you want this optic for a bedside firearm, the auto on might not work when you need it. Mainly because the gun will probably not get moved enough to keep the auto on/off working. For duty use, it is probably fine because the movement of it being on you will keep the sight from turning off. Something to think about. Gideon does have other optics without the 12 hour off feature, so one can always check those options out.

  Another feature I like on the Omega is the top load battery. With the top load battery, you will not have to take the sight off to change it. Gideon gave the Omega a CR1632 battery. They spec the battery life at “up to 50,000 hours”. So if you leave it on the brightest setting, I do not know how long the battery will last. But I really do not think anyone has to really worry about the battery life.

  The Omega is super light. Gideon states that it weighs 1.8 ounces with the battery. This is one of the reasons I decided to mount it on that lightweight 10/22. As far as physical size, it is 2.06 inches long x 1.21 inches wide x 1.25 inches tall. So even though it has a good window size, the Omega is still small. 

  Sighting in the Gideon Omega was super easy. It was almost centered up after mounting. I even sighted it in right before a local steel challenge competition. I set a target about 15 yards away and went to town. Adjustments on the Omega have actual clicks. Yes, they are tiny sounds and feel, but at least it has them. I am a fan of clicks on these micro optics. If it does not have them, how do I know how far I actually moved the adjustment screw? Thank you Gideon for putting actual clicks in the adjustments.

  I was really happy with how the Gideon Omega works. I know it will handle the recoil of a pistol, at least based on my previous experiences with other Gideon Optics. I was surprised at how well I liked the Omega on a small rifle. It performed fantastic. Yeah, I am not a fan of the 12 hour auto off function, but since I have it on a competition 22, it does not really matter. Would I recommend it to someone? Yes, it is a fantastic green dot reflex optic. 

  Sometimes life throws you a curveball and you hit it out of the park. I had not planned on mounting the Gideon Omega to a 22, but I did. The Omega works so well on that 22 that I am not taking it off to install it on a pistol. The green dot is clear and a great size. Gideon is really the one that hit the home run with the Omega. I love the size and features it has. If you want to check it out, head over to Gideon Optics.

Firearms Insider Reviews - Key Points

Claim to Fame:

Large window reflex sight mainly for pistols, but also at home on rifles

Target Market:

Anyone wanting a quality large window red dot at a fair price

Features, Benefits, and Specifications of this product:

  • Magnification: 1x

  • Lens Dimensions: 22.3mm tall x 27mm wide

  • 7075-T6 aluminum body

  • Elevation/Windage adjustment range: 45 MOA (Total 90 MOA)

  • Click Value: 1 MOA per click

  • 3 MOA Dot

  • Parallax Free: Beyond 33 yards

  • Red Dot Brightness Setting: 10 levels (8 visible, 2 NV compatible)

  • Power Supply: 1x CR1632 3V Lithium battery

  • Battery life: 50,000 Hours

  • Top load battery

  • Auto Wake/Sleep: 225 Seconds after no movement, Deep Sleep after 12 hours

  • Shockproof & IPX7 Waterproof

  • Dimensions: (LxWxH) 52.5mm x 30.7mm x 31.7mm

  • Weight (with battery installed): 1.8 oz (approx.)

  • RMR footprint

  • Picatinny mount included

  • Lifetime Warranty

What other aesthetic options or finishes are available?

Red Dot only, Green Circle Dot, or Red Circle Dot

What others are saying?:

The Gideon Omega does exactly what it needs to. It provides a big window, competition style optic that performs. Shake-awake type functionality is welcome and is essentially the only "advanced" feature an optic like this really needs. I also appreciate the easier to actuate buttons versus some other brands. This is a tradeoff of course as you could get some accidental presses in some situations, but it suits my preference for fast adjustment. After my first 200 rounds with the Omega I've noticed zero issues and will be running this solution for competitions going forwards (and saving hundreds in the process).

Link to other reviews:

The Armory Life   

Price point:

MSRP = $229.99 discount code “GGR”  knocks it down to $206.99

Retail = $195.99 at JSD Supply   

I need it now! Availability:

Gideon Optics or JSD Supply

Our Rating:

Pros:

  • Large window

  • RMR footprint

  • Clear dot

  • Auto on/off

  • Top load battery

Cons:

  • 12 hour Deep Sleep mode

Score: 8.50 Great

Favorite Link:  Gideon Judge Review

Civivi Elementum Limited Edition

  It is Civivi’s 10th anniversary, so they came out with some limited edition knives. Since the Elementum is Civivi’s flagship folder, of course the limited edition one is in the Elementum series. The basic Elementum is a flipper style knife available with a variety of options. Special features of the Limited Edition knife are the blade steel, handle, and markings.

   The main reason I am doing the review on a sold out Limited Edition knife is because Civivi periodically makes versions like it. So the information on blade steel and handle material will still be useful. If you look at the Elementum on Civivi’s website, you can see how many options are available. They typically also do dealer only collaborations with places like Knife Center and Blade HQ. 

  This Limited Edition (LE) Elementum’s specifications are essentially the same as most in this series. It is a liner lock, flipper style knife. Yes, the flipper is the only way to effectively open the blade up. The LE Elementum uses the same ceramic ball bearings which give it that smooth Civivi opening. All the number specs are down below, so I will not bother you with them here. The Elementum series also has a lanyard hole. Civivi’s Elementum series are usually very thin, and the 10th Anniversary LE is also coming in at 0.43 inches. This slimness makes pocket carry very easy, as does the knife only weighing 2.8 ounces. 

  There are a few differences in the 10 anniversary LE Elementum. I will start with the short one. The LE Elementum has a titanium pocket clip instead of stainless steel. Also, this click is coated to match the knife's looks. My only complaint about the pocket clip is that it can not be reversed. You are stuck with tip up, right hand carry. That is how I carry my knives anyhow, but if you carry a knife in your left pocket, it might not work as well for you. The clip is very strong and works like it should.

  For the handle on the LE Elementum, Civivi uses carbon fiber. This is not your everyday carbon fiber. Civivi calls it “Jungle Wear Fat Carbon Fiber”. What does that mean? Well, essentially it is a flake style carbon fiber with black, gray and green colors to it. These colors and flakes give the handles a camouflage look, hence the “Jungle Wear” name. Since the handles are carbon fiber, they are smooth. There is no texture at all. I do not mind the lack of texture because it makes for a knife that slides smoothly in and out of your pocket.

  It is time to discuss the last main factor in the LE Elementum, and that is the blade. Being a limited edition knife, Civivi stepped up the blade steel. The LE Elementum has S35VN blade steel. This high quality blade steel is rarely seen on Civivi knives. I really like S35VN steel. It holds an edge for me extremely well. Yes, it does take a little longer to sharpen, but since I do not have to sharpen it as much, I am okay with the trade off. This LE Elementum uses a drop point style blade that is hollow ground, just like most of the knives in the Elementum family. The blade is 2.96 inches long and comes very sharp. Lastly, there is some impressive jimping on the top of the blade. A nice, useful, touch for this knife.

  Even though this Civivi Elementum is a limited edition, I had to carry it around for a while. I really enjoyed the LE Elementum. It is the perfect size and weight for an everyday carry pocket knife. The flipper smoothly opens the blade out when needed. Probably thanks to those ball bearings. Granted I would like another way of opening the Elementum besides just a flipper, but I doubt most people would even notice that it is a flipper opening only knife. All of the Elementum series are great EDC knives, this one just happens to be a little fancier. Being that this is the Civivi 10th Anniversary knife, it came with a challenge coin. It is individually numbered with only 2014 being made and comes with a Signed Certificate of Authenticity.

  So if you are in the market for a really good EDC knife, check out the Civivi Elementum line. If you are looking for something like the Limited Edition version, check out some of the dealer only collaborations. The Limited Edition Elementum is just a fantastic knife due to the S35VN blade steel and the awesome looking carbon fiber handle. You can check out all the Elementum series knives HERE.  

Firearms Insider Reviews - Key Points

Claim to Fame:

10th anniversary limited edition Elementum

Target Market:

Knife users that want a great blade steel

Collectors

Features, Benefits, and Specifications of this product:

  • Overall Length: 6.99" / 177.6mm

  • Width: 1.19" / 30.3mm

  • Overall Height (Include Clip): 0.66" /16.8mm

  • Blade Length: 2.96" / 75.2mm

  • Closed Length: 4.03" / 102.4mm

  • Blade Thickness: 0.12" / 3mm

  • Handle Thickness: 0.43" / 11mm

  • Knife Weight: 2.81oz / 79.7g

  • Blade Material: CPM S35VN

  • Blade Hardness: 59-61HRC

  • Blade Grind: Hollow

  • Blade Finish: Satin Finished

  • Blade Type: Drop Point

  • Handle Material: Jungle Wear Fat Carbon Fiber

  • Handle Color/Finish: Green, Black

  • Liner Material: Stainless Steel

  • Liner Color/Finish: Gray

  • Pocket Clip: Tip-Up, Right Carry

  • Clip Material: 6AL4V Titanium

  • Clip Color/Finish: Green

  • Pivot Assembly: Caged Ceramic Ball Bearing

  • Locking Mechanism: Liner Lock

  • Only 2014 made

What other aesthetic options or finishes are available?

Many

What others are saying?:

4.5 out of 5 stars, 4.9 stars total at Civivi.com

Awesome EDC

Lightweight, no hard edges. S35VN!! This is 4.5 stars for sure but the bearing action could be a tad bit smoother. Other than that, I love it!! Will be rotating this in my everyday carry!!

Link to other reviews:

None found as of publishing

Price point:

MSRP = $103.50

Retail = Good luck

I need it now! Availability:

Civivi possibly

Check online

Our Rating:

Pros:

  • Collectors Edition

  • S35VN blade steel

  • Carbon fiber Handle

  • Great size for EDC

  • Smooth function

Cons:

  • Sold Out due to being a limited edition knife

  • Only one way to open

Score: 8.50 Great

Favorite Link:  Civivi Conspirator review

CP Firearms Dragonfly

  When it comes to the Ruger 10/22, or its variants, there are tons of options for customization. CP Firearms has one of them. It is the Dragonfly kit. The CP Firearms Dragonfly kit eliminates any part of the rifle that adds weight. They do this with carbon fiber and nylon. I was sent a Dragonfly kit to try out and it does exactly what CP Firearms said it would do.

  The Dragonfly kit comes with everything needed to upgrade that 10/22. In this case it is pins, a handguard, a stock, and the receiver to stock adapter. It does not supply the 10/22 receiver or trigger pack. However, CP Firearms make two different Dragonfly kits. One is for the standard style receiver and the other is for an extended rail receiver. The Dragonfly will not fit Take-Down receivers. However, it should fit just about any standard 10.22 receiver.

   Before I go into the individual parts, I want to mention a few things. The Dragonfly kit is primarily designed for .22 rimfire action events, like Steel Challenge and Rimfire Challenge. With these shooting disciplines, you want a lightweight rifle that swings very quickly from target to target. Especially since winning is based on the fastest time. Because the Dragonfly kit strips down the 10/22 to just the essential parts, some people may find it to not be very attractive. I however kind of like the carbon fiber, stripped down version. It reminds me of something like a Baja 500 racer.

  Starting at the front of a 10/22. The Dragonfly gives you a tube style carbon fiber handguard. You still use your supplied barrel. I used my Faxon flame fluted tapered barrel. Super lightweight barrels are available from various sources including CP Firearms. By using one of these super lightweight barrels, one can lose about a pound over what I have and make the whole 10/22 weigh in at 3 pounds. The Dragonfly’s handguard has that really nice carbon fiber look to it. It also is very functional with a diameter of 1.58 inches and a length of 10.5 inches. To install the handguard, CP Firearms has a barrel clamp that the handguard then screws to. So you must first remove the old barrel clamp and install the CP Firearms one. Once this is done, you can slide the handguard onto the clamp. The Dragonfly kit they sent me was super tight. I had trouble sliding the handguard onto the adapter. I ended up tapping the handguard on with a rubber mallet. Once on, just snug up the screw for the handguard and you are ready to rock. The Dragonfly’s handguard allows for barrels up to 0.924 inches in diameter, so most barrels will fit under it. The tight fit makes the handguard extremely rigid.

  Since the Dragonfly kit does not use any kind of chassis, or typical stock, it needs a way to attach the receiver to it. CP Firearms includes pins and screws to keep the trigger pack attached to the 10/22’s receiver. Pins are also provided for the receiver extension.

  Once the Receiver Extension is pinned onto the receiver, you can mount up the other parts. You will need an AR style pistol grip. CP Firearms says to use one with a beavertail, but ones without will work. I tried both and found out that the beavertail AR grip does work far better than one without the tail. The Dragonfly’s receiver extension is threaded using standard AR buffer tube threads. 

  Lastly, we have moved toward the rear of the 10/22 and the stock. The CP Firearms stock is also comprised of a carbon fiber tube. It has those AR buffer tube threads, so you can screw it into the Dragonfly’s receiver extension. So screw it in and tighten down the castle nut. The carbon fiber tube is covered by a soft rubberish cover. This cover gives one a comfortable cheek weld on the stock. At the end of the tube is the adjustable butt plate. The butt plate itself is slightly curved and decently sized. On it are raised bumps to give a good purchase on one's shoulder. It is hard, but I didn’t even notice when shooting the Dragonfly, probably because it is a 22. The buttplate is adjustable for tilt and rotation. So you can twist it left or right and/or tilt the butt plate up or down. I really like the adjustability of the stock. In the stock form, the stock is an inch longer than the factory 10/22 stock. Technically one can also adjust length of pull, but only by about ½ inch until the tube hits the butt plate. I ended up cutting 1 inch off of the tube to make the length of pull more comfortable for me. To cut the carbon fiber, just wrap it in masking tape at the place you are cutting and saw through it. Then sand the end of the tube to get any imperfections out. 

  When CP Firearms asked if I wanted to try out the Dragonfly, I was a little hesitant. But then I shot the prototype at a steel match. So when they asked if I wanted one of the production versions to do a review on, I jumped at the chance. Even though mine weighs in at 4 pounds, a pound heavier than the prototype, it still shoots fantastic. As previously mentioned, I used a 16” standard style tapered barrel and not one of the super lightweight ones available. I mounted up a Gideon Optics Omega to the Dragonfly. It is a great optic for this type of shooting. I was able to score really high up in the rankings, at the local steel matches, with the Dragonfly kit installed. The Dragonfly kit just screams “Speed”. 

  If you are looking for a way to make your 10/22 as light as possible, the CP Firearms Dragonfly kit might just be it. If that is you, you probably shoot some type of rimfire speed shooting competition and need the benefits of the Dragonfly. I also see the advantages of having a super lightweight 22, even if you don’t shoot competitively. Either way, you should probably check out the CP Firearms Dragonfly kit.

Firearms Insider Reviews - Key Points

Claim to Fame:

Lightweight kit for 10/22’s

Target Market:

Competition shooters or anyone who wants a really lightweight 10/22

Features, Benefits, and Specifications of this product:

  • Weighs virtually nothing

  • Receiver Extension - included

  • CP Complete M4 Style Buttstock - included

  • CP Front Carbon Fiber Handguard - included

  • All Necessary Hardware is included

  • Fits most 10/22 receivers except take down style

What other aesthetic options or finishes are available?

None

What others are saying?:

Nothing found as of publishing

Link to other reviews:

Nothing found as of publishing

Price point:

MSRP = $400.00

Retail = Same

I need it now! Availability:

CP Firearms

Our Rating:

Pros:

  • Carbon Fiber

  • Comes with all hardware to install

  • Super lightweight

  • Fast from target to target

Cons:

  • Long stock

  • Hard to install forearm

Score: 8.50 Great

Favorite Link:  Faxon 10/22 barrel review

Swampfox Tomahawk II

  Not too long ago, Swampfox Optics released an updated version of their Tomahawk Low Power Variable Optic (LPVO). It is rightfully called the Tomahawk II. Along with other upgrades, it also offers a new style of reticle called the Bright Fiber Optic or BFO. The Tomahawk II still retains its second focal plane as well as coming in either a 1-4 or 1-6 magnification range. Swampfox sent me the 1-6x24 Tomahawk II with the Blue color BFO to review.

   LPVO’s are all the rage right now. The Tomahawk II falls nicely into this category with the magnification going from a red dot style 1x, to a useful 6x. It also has a pretty standard 30mm tube. Of course it has multi-coated optics, a fast focus diopter, an optional throw lever, and a great warranty. 

At 6x, Brightness is around 7 or 8

  Swampfox’s Tomahawk II Bright Fiber Optic reticle is probably part of the reason you are looking at this. The BFO has a brightly illuminated dot inside the scopes crosshairs. This particular LPVO has the Blue dot.  An Amber, Red, or Green center dot are available. The only illuminated part of the reticle is the center dot. The Dot size is listed as 0.6 MOA. Because of the crosshairs, the tiny dot size just looks like a normal size 1-2 MOA dot, at least to me. The crosshair itself is very useful too. In the reticle are hash marks spaced at 5 MOA increments. Since this is a second focal plane (SFP) optic, the stadia marks are only correct at 6x, or the largest magnification range. The reticle’s visual size also does not change with magnification increases or decreases due to it being in the SFP. There are 6 stadia marks for elevation and ranging. While there are 3 stadia marks, in each direction for windage. You can use the MOA stadia marks to range with if needed. The big advantage of the BFO reticle is that you can run the LPVO like a true red dot at 1x. Or in this case, a Blue dot. Why blue? Because it is easy on the eye and is picked up quickly due to our eyes color sensitivity. Then if you need ranging ability, you can turn the adjustment ring to 6x and use the MOA stadia of the reticle while still having the illuminated blue center dot.

  Magnification adjustments on the Tomahawk II are pretty straightforward. To adjust it, there is a large adjustment ring toward the rear of the scope. Turn it to the left to increase magnification, and to the right to decrease it. From 1-6x is a little less than one half turn. The adjustment ring has deep grooves in it to aid in getting a grip on it. This adjustment ring is smooth to operate and not too stiff. Swampfox also includes a separate throw lever. This throw lever just clamps on with a little screw. They send 2 screws with it, but do not give a torque specification. Which is probably why I needed the extra screw after breaking the first. The throw lever is very usable. At first I did not think I would like how it clamped on. But this feature allows you to put the throw lever in any position you desire. An actual plus over some of the fixed throw levers. 

  Illumination for the BFO is done by the knob on the left side. This knob also houses the 2032 battery. There are 12 levels of illumination for the BFO dot. Essentially from night vision dim to needing sunglasses bright. Yes, the dot is super bright at the 12 setting. So bright that even in direct sunlight I did not use the 12th setting. Between each brightness setting, on the dial, is an off setting. This is a feature that I really like. Especially since the Tomahawk II does not have any type of auto on/off feature. If you want this feature, the Tomahawk II does work with an Auto Live battery cap, as I did try it. 

   Swampfox installed some pretty nice reticle adjustment knobs on the Tomahawk II. Both the windage and elevation knob have 0.5 MOA click adjustments. These clicks are pretty decent, but the elevation knob’s are better than the windage ones. The windage knob is capped. However, the elevation knob is not capped. Instead it uses a pull up to turn knob. One must first pull the knob up, then it can be adjusted. Push the knob back down and it locks that adjustment into place. With the turret being locked into place, there is no need to worry about it moving if bumped or bashed around. Both the windage and elevation knobs can be set to zero so you know where to turn them back to. I’ve used push to lock style turrets before, and always like them.

  Glass quality on the Tomahawk II was pleasantly surprising. For an approximately $400 LPVO, I was impressed with how clear the Tomahawk II is. Images appear clear and bright with very little distortion around the outer edge. The eye relief is pretty forgiving, even at 6x. There is also a decent 20 foot field of view at 6x. Lastly, the fast focus diopter lets you get the reticle adjusted for a picture perfect image. I could not ask for anything more out of this optic.

  Swampfox also sent one of their Hostile Engagement Mounts for the Tomahawk II. This is their top of the line one piece mount. The Hostile Engagement Mount (HEM) includes a place to mount an RMR footprint reflex sight directly to the rings, at a 45 degree offset. I didn’t use the RMR feature, but it does have steel inserts for the screws, so they probably will not strip out. The HEM has some really nice recoil lugs built into it. So I would not hesitate to install it on something with a little more recoil than my standard AR. It is available in a 30mm or 34 mm size. I used the 30mm one because that is the tube diameter of the Tomahawk II. Being that the HEM weighs a bit over 8 ounces, and the Tomahawk II weighs 20 ounces, this combo does add a bit of weight to your rifle. So if you are looking for something super light, maybe use one of Swampfox’s other AR mounts.

  I like the Swampfox Tomahawk II. The BFO is fantastic for close up work. It literally is like using a 1x red dot, or should I say blue dot? The MOA style reticle also works well for me. I like the 5 MOA stadia marks as I can use them for bullet drops or ranging. My one dislike is that I can definitely tell the weight of the scope/mount combination. Especially when transitioning from target to target. However, the clear glass and bright dot make this an excellent option in the LPVO market.

  The Swampfox Tomahawk II is a stand up LPVO. The BFO reticle makes it both fast and precise. That center dot of the reticle is probably why you are looking at this anyhow. Why not have an LPVO that you can use as a dot style optic? Plus, you will be able to see your target nicely due to the clear glass. The lock down turret knob is also a nice touch. So if you are looking at fair priced LPVO's that work as red dots, take a look at the Swampfox Tomahawk II.

Firearms Insider Reviews - Key Points

Claim to Fame:

Affordable 1-6 LPVO with a bright colored illuminated center dot

Target Market:

Anyone, Hunters, Target shooters, Competitors, Law Enforcement, etc

Features, Benefits, and Specifications of this product:

  • Magnification: 1-6x

  • Tube Diameter: 30mm

  • Objective Lens Diameter: 24mm

  • Exit Pupil (mm): 7.6mm-3.9mm

  • Eye Relief: 3.39”-3.54” (1x-6x)

  • FOV @ 100 Yards: 120.43’-20.9’ (1x-6x)

  • Click Value: 1/2 MOA

  • Parallax Setting: 100 yds

  • Travel Per Rotation: 100 Clicks/50 MOA

  • Max Windage & Elevation Adjustment: 100 MOA

  • Fully Multi-Coated / Anti-fog / Hydrophobic lens coating

  • Illumination: 12 illumination settings with intermittent on/off positions

  • Side-mounted CR2032 Battery

  • Second Focal Plane Bright Fiber Optic Reticle

  • Fast Focus Diopter: -2 to +2

  • Push/Pull Locking elevation Turret with Zero Reset and capped windage turret

  • Length: 10.55”

  • Weight: 20.59 oz

  • Waterproof Rating: IPX7

  • Impact Resistance: 1,100 G Force

What other aesthetic options or finishes are available?

1-4x

Red or Green BDC reticle

Red, Green, or Amber BFO reticle

What others are saying?:

Nothing found as of publishing

Link to other reviews:

Parallel Defense on YouTube    

Price point:

MSRP = $449.00

Retail = $380 at Brownells

I need it now! Availability:

Swampfox Optics or Brownells

Our Rating:

Pros:

  • Super clear glass

  • Bright Fiber Dot MOA reticle

  • Locking Turret

  • Useful magnification range

Cons:

  • Weight

Score: 8.00 Great

Favorite Link:  Swampfox Liberty Green Dot review   

Lucid Optics E7

  Small, fully enclosed, red dots have become commonplace. These dot sights can be used on rifles, shotguns, or pistols. That makes them very useful. Lucid optics has one of these enclosed “dot” sights named the E7. The Lucid E7 has something special under its hood. That special twist is a BLUE colored reticle instead of your standard red dot.

  Besides the blue reticle, Lucid’s E7 reflex sight is pretty standard. The E7 is essentially a square rectangle with a length of 1.78 inches. Okay, it is not a true square, but you get the idea.  It uses the industry standard footprint for these types of sights. That standard is the ACRO footprint. The nice thing about the ACRO footprint is that you can get a multitude of adapters to fit it on just about any firearm. The E7 comes with a tall picatinny adapter that is pre installed. Also in the box is a MOS adapter should you choose to run it on a Glock pistol. I used the tall picatinny adapter because I mounted the E7 on a Foxtrot Mike AR’ish pistol. It worked great in this configuration. 

  Before I get into the blue reticle design of the E7, let’s get into some of the specifications. This is a 1x reflex sight, so there is no magnification. The exterior is made from 7075 aluminum. So you should be able to bash it around if needed. The E7 tips the scales at a lightweight 2.65 ounces. It runs off of a CR2032 battery with a 50,000 hour life, thanks to the “shake awake” feature of the E7. The auto on/off feature is really a favorite of mine. The rest of the specs can be seen down below in the “Features” section.

  The Lucid Optics E7 is the first reflex sight with a blue colored reticle. Why blue? Blue is calming to the human mind. That leads to less fatigue if seeing it for extended periods of time. It also appears very sharp, making it ideal for reticle designs. But most important to us shooters, is that blue colors are typically not found on things we shoot at. Now if you are shooting in a field of blue flowers, that might be an exception. The blue reticle just doesn’t blend into stuff like a green one might. Even against blue sky, you can still see the reticle of the E7. So if you are training and have different color targets. When someone says “shoot the red target”, you don’t lose track of your dot with the blue, like you might with a red dot.

  Now for the reticle design. Lucid Optics uses their M5 reticle in the E7. I will do my best to describe it, but look at the picture of it. In the middle is a 4 MOA dot. This dot is surrounded by about two thirds of a 32 MOA circle. Then, on the bottom, at 45 degree angles, are two lines. Having both the 32 MOA circle and those two lines help to draw your eye straight to the center dot. Lucid Optics says that between the blue color and this reticle, it helps to give up to 30% faster target acquisition over just a dot. I do not know if I was 30% faster with the E7, but the reticle is pretty fast and does draw my eye into it, so it is easy to pick up a sight picture. I really like the design of the reticle. 

  Since the Lucid E7 is an enclosed sight, it does have some advantages. The most obvious is that the guts of the E7 are protected from dirt, water, oil, and other objects that might cause problems. If you have ever gotten water on the emitter of an open reflex sight, you know what advantage having a closed system does for you. If you happen to get something on the E7’s 21x18mm lens, you can just wipe it off. The enclosed system also puts all the controls on the outside where they are easy to get to. In the E7's case, the brightness up/down is on the left side and the battery compartment is on the right side. The windage adjustment is also on the right side. The elevation adjustment is on top, as one would expect. Both of these have positive click adjustments for easier use. However, they are small and need a small flathead screwdriver to adjust. I was pleasantly surprised with the adjustment clicks, being that they are so small.  

  I am pretty happy with how the Lucid E7 performed. It is a great little 1x reflex sight. I really only have one complaint. If you turn up the brightness on the M5 blue reticle, it blurs together for me. This is due to my astigmatism. So do not worry about the reticle being clear, unless you have bad eyes like me. Because the reticle has more in it then just a dot, that is why it is worse for me. HOWEVER, if I turn the brightness down a little, the reticle clears up nicely. Plus, due to the blue reticle, I can get a clear reticle at a lower brightness setting than if it were red in color. This really only plays a role if I am shooting at distant targets. Up close I just use the bright blue as a larger dot. Just put the reticle on the target and engage. I also like the size and weight of the E7. It is the perfect size for a lightweight AR pistol or SBR. Having the ACRO footprint also lends the E7 to be right at home on a handgun, if you were to choose that option. The E7 has been a great little reflex sight and has stood up to my abuse.

  Since the Lucid Optics E7 is the first blue colored reflex sight, it stands out against all the other ones. Yes, you will pay a few dollars more, but you get an actual reticle in a blue color, not just a red dot. The construction is nice and sturdy with easy to use controls. It has great battery life thanks to the “shake awake” feature. So if you are looking for a good enclosed style reflex sight, but with a blue twist, check out the Lucid Optics E7

Firearms Insider Reviews - Key Points

Claim to Fame:

Blue illuminated reflex sight

Target Market:

Those wanting something different. Sight can easily be used for just about anything from handguns to rifles

Features, Benefits, and Specifications of this product:

  • Finish: Matte Black

  • Material: 7075 Aluminum

  • Magnification:  1x

  • Lens Diameter:  21mm x 18mm

  • Reticle: M5

  • Illumination Color:  Blue

  • Emitter Type:  Enclosed

  • Battery Life:  50,000 hours

  • Length:   1.78″

  • Weight:  2.65oz

  • Field of view: 60 ft @ 100 yds

  • Footprint:  Aimpoint ACRO

  • Mount:  Picatinny/ACRO adaptor mount included

  • Battery: CR2032

  • IPX7 Waterproof

  • Shake Awake

  • 90 MOA Windage and Elevation Adjustment

What other aesthetic options or finishes are available?

None

What others are saying?:

3 out 5 stars at OpticsPlanet.com  

Blurry for my eyes and sons eyes

I had trouble seeing the optic clearly and so did my son. My buddy had no issue seeing it. He doesn't wear glasses and neither does my son. I do. Was bummed. However I still hit the target. So far not a horrible optic, just wish I could see it clearly.

Link to other reviews:

Shooting News Weekly  

Price point:

MSRP = $299.99

Retail = $239.95 at OpticsPlanet.com   

I need it now! Availability:

Lucid Optics or Optics Planet

Our Rating:

Pros:

  • Blue reticle is easy on eyes

  • Reticle design is fast to pick up

  • Shake Awake

  • Acro footprint

  • Actual click adjustments

Cons:

  • May not be good for people with astigmatisms

  • MSRP is a little higher than other optics in this class 

Score: 7.50 Good

Favorite Link:  Lucid L7 1-6x24 review   

Black Talon Tactical AR trigger

  The AR market is saturated with aftermarket triggers. If you want to stand out from the big names, you need to do something better and different. Black Talon Tactical has done just that with their Single Stage Calibrated Adjustable Drop In trigger. Yes it has a long name, but it really does describe the Black Talon Trigger quite well. They shipped me out their Improved Finger Position (IFP) profile trigger to try out. For the $180 price tag, I was not disappointed. 

  Black Talon Tactical’s drop in trigger is different in many ways. These differences are all good in my opinion. One, it has an adjustable trigger pull weight from 2-5 pounds. Two, this particular version uses the Improved Finger Position (IFP) trigger shoe that I’ll describe later. Lastly, the Black Talon triggers also have zero take up, very minimal break travel, and a tiny bit of overtravel.  

  When Black Talon Tactical says the trigger pull weight is adjustable, it is even more than that. As mentioned, the trigger’s pull weight is adjustable from 2.0 pounds to 5.0 pounds. I am pretty sure they specify the decimal point because the trigger has a precision adjustment scale on it. Black Talon Tactical also states that the trigger is calibrated to within 1 ounce of the marked adjusted trigger pull weight. Plus, the trigger pull weights are repeatable on the scale. The only noticeable drawback to the IFP trigger is that it must be removed to adjust the pull weight. To adjust the pull weight, just use the supplied allen wrench to turn the screw to the setting you want, it’s that easy. For a small fee you can send Black Talon Tactical a stripped lower receiver and they will modify it so that the trigger can be adjusted without removing it. I did not send in a receiver, so I can not tell you anything about the modification. I will testify to the fact that the adjustment is repeatable. I adjusted the trigger a few times, and then set it back to a 2.5 lb pull. My trigger pull gauge reads 2.5 lbs pretty much every time I check the trigger’s pull weight. 

  While Black Talon Tactical makes these triggers in a standard curved and flat trigger shoe, they also have something different. This different shoe is called the Improved Finger Position (IFP) profile. Essentially the IFP shoe is a flat trigger until you get down toward the tip. Then the trigger has a little curved section that is angled toward the shooter's finger. This little section is about 5/16 inch long. What it does is allow for really precision trigger manipulation. Yes, you can get a really precise feel out of it. The straight portion of the trigger is then used for normal or fast shooting. I thought the IFP trigger shoe was great. It works just as described. When I want precision shots, I just move my finger down to the bottom. When I want to go fast, I just use the flat section of the trigger as normal. And this trigger is fast.

  Installation of the Black Talon trigger is pretty standard. Remove the safety and old trigger. Slide the Black Talon trigger into position. Slide in the supplied anti-walk pins. Tighten anti-walk pin screws. Install safety. Now for the important step: tighten the two rear screws that put upward pressure on the trigger housing. If these screws are not tightened properly, the trigger may not work correctly. I originally had the trigger in a polymer AR lower and had a few failure to fire’s. My best guess is that the polymer flexed enough to cause problems, since those two rear screws couldn’t get tight. When I installed it in a standard aluminum AR lower receiver, those problems stopped. It has over 500 rounds in the aluminum AR receiver and has run flawlessly for over 500 rounds. All the necessary allen wrenches are also included so there is no need to run around trying to find some.

  My favorite aspect of the Black Talon Tactical Single Stage Calibrated Adjustable Drop In trigger is the actual pull, or lack thereof. The actual amount of movement in the trigger, to fire the AR, is minimal. Black talon states 0.5 mm, which is 0.020“. I just know that when I tested it, it was less than 0.040”. The break on the Black Talon Tactical trigger is also fantastic. I wouldn’t say glass rod, even if it is close, but I will say it has a super short tactile feel to it. Overtravel is stated at 1.25mm, or 0.050” maximum. I don’t think the one I have is that long. I will mention that the overtravel feels shorter because it is not the normal free travel that most triggers have. Instead it feels kind of spongy, but it is so short that maybe I am just feeling the end of the total movement. Either way, the overtravel is not really even noticeable. The reset on the trigger is good and a little forceful. The reset is a little better than most drop-in triggers in this price range. Click here for a short video of the trigger movement. 

  I’ve put quite a few rounds through the Black Talon Tactical trigger. It is just so much fun to use. I have another trigger that feels a bunch like this one. The difference is that the Black Talon trigger is adjustable. Plus the IFP trigger shoe is unique in how you can go from fast to precision easily. When I was running a bunch of bill drills with the IFP trigger, I could get 0.10 second splits. 0.12 seconds were really common. If you want a really fast trigger, this may be one to look at. I probably wouldn’t recommend this trigger to a novice shooter. The break is just too short and quick in my opinion. But, the nice thing about this trigger is that you can set the pull weight up to 5 pounds, then as you get more proficient with it, you can turn the pull weight down. 

  If you can not tell, I became a big fan of Black Talon Tactical’s Single stage trigger. It really does everything an aftermarket single stage AR trigger should do. It has adjustable pull weight, a super short trigger pull, and a great trigger break. You also get the IFP trigger shoe for more precision shots. Go check out the Calibrated Adjustable Drop in Single Stage Trigger from Black Talon Tactical, it is worth a look.

Firearms Insider Reviews - Key Points

Claim to Fame:

Single stage adjustable AR trigger 

Target Market:

AR users who want a super fast, adjustable pull weight, trigger

Features, Benefits, and Specifications of this product:

  • Improved Finger Position (IFP) trigger shoe

  • Adjustable pull weight between 2.0 - 5.0 lbs

  • Repeatable adjustments to within 1 ounce

  • Zero take up

  • 0.5 mm break

  • 1.25mm max over-travel

  • Cartridge style drop in housing

  • A2 tool steel construction

  • Anti-walk pins included

  • Lifetime warranty

What other aesthetic options or finishes are available?

Curved bow and Straight, all options in fixed pull weights too    

What others are saying?:

5 out of 5 stars at Opticsplanet.com   

Love this trigger

I'm always looking for new/different products to upgrade my rifles and this is my favorite recent discovery. I love that it's adjustable and I set the weight at about 2.5 lbs and it is amazing! The IFP design is great as it gives you multiple positions for finger placement and it makes it easier to rapid fire. The hammer design on this trigger is unique and the housing feels extremely durable.

Overall I would recommend this trigger to anyone looking for something new and better.

Link to other reviews:

None found as of publishing

Price point:

MSRP = $179.99

Retail = $161.99 at Optics Planet    

I need it now! Availability:

Black Talon Tactical or Optics Planet 

Our Rating:

Pros:

  • Super short trigger break

  • Good reset

  • Adjustable pull weight

  • Super fast to shoot

  • Improved Finger Position (IFP) profile trigger shoe

  • Precision shooting option due to the IFP

  • Drop in design

Cons:

  • Might not be the greatest trigger for novice shooters

  • Must take the trigger out to adjust

Score: 9.00 Amazing

Favorite Link:  Magne-Tech Rigel II review

Primary Arms GLx RS-15

  When it comes to mini reflex red dot sights, everyone seems to have one or more in their catalog. Primary Arms has them also. The difference is that Primary Arms has broken the “same old dot” mold by designing and using an innovative reticle called the ACSS Vulcan. They have put this reticle in their brand new GLx RS-15 mini reflex sight. I tested the GLx RS-15 on a shotgun and a pistol just to see how it worked. 

  For everyday purposes, the Primary Arms GLx RS-15 is a reflex red dot sight. That is only the beginning of the story. First, the RS-15 is in Primary Arms’ GLx line. The GLx line is Primary Arms’ mid-tier optics line. That means you get a higher class of technology and materials at a fair price. The RS-15 comes in at $359 dollars, which isn’t bad when you count how many features are in it. In this line you tend to get new and innovative reticles and sharper glass, leading to a crisper dot. It also has the ACSS Vulcan reticle. Which I will explain, at length, later. Some of the other features it has include: A top load battery, 7075 aluminum housing, and Autolive technology, just to name a few.

Camera is closer to optic, to give an almost complete view of the reticle

  The GLx RS-15’s ACSS Vulcan reticle is an innovative design. For simple explanation, it is essentially a 3 MOA red dot. Then it has an outer ring around that dot. That outer ring is 250 MOA. So what happens is that when you hold the RS-15 at arms length, the outer ring is not seen if the dot is in the center of the window. If you move the sight up/down or left/right, the outer circle starts to come into the window's view. This allows the shooter to see which way the gun needs to move, so you can get back to having the dot centered. Take for instance you see a curved line in the right or left side of the window. Just move the muzzle of the firearm toward the direction of that curved line, and you should then see the aiming dot. Same with up or down. If the curved line is on top, move the muzzle up, if it is toward the bottom of the window, move the muzzle down. The ACSS Vulcan reticle is a great reticle to learn how to shoot red dots on pistols. Yes, it even helps out seasoned shooters like myself. After you use the Vulcan reticle for a while, and want to try just a normal dot sight picture, it has an option to turn off the outer ring so that it is just the 3 MOA dot. Just hold down the brightness down button for 3 seconds and it will cycle between the two modes. I’ve been really impressed with the ACSS Vulcan reticle.

  Primary Arms’ Autolive function is also built into the GLx RS-15. However, it works a little differently than their normal Autolive version. After around 10 seconds of no movement, the RS-15 shuts off the 250 MOA ring and leaves just the 3 MOA dot. Then after around 4 minutes of no movement, it shuts down the dot reticle. Have no fears, just barely move the RS-15 and the full Vulcan reticle will come back on. This helps aid in longer battery life. Battery life is pretty good. Primary Arms states 25,000 plus hours on medium setting with just the dot, and around 5,000 hours with the Vulcan reticle. It may sound substantially less, but 5000 hours is still 200 days of continuous “on.” And with the Autolive, it will not be continually on for 200 days. I’m a big fan of Autolive, or any of the auto on/off systems. 

   Mounting the GLx RS-15 might lead to some hassles. The RS-15 uses a C-More mounting footprint. Trying to find an actual C-More footprint optics cut is not easy. Slides with these optics cuts are available, but not nearly as prevalent as a RMR footprint cut. However, If you have a slide cut for a Delta Point Pro (DPP), and it doesn’t have the recoil lug bosses built in, the RS-15 will mount right up. This is because the screw hole spacing is the same for a DPP or a C-More footprint. This mounting footprint is the GLX RS-15’s biggest flaw. First I mounted the RS-15 up to a shotgun, with the help of a Warne Red-dot Shotgun Rib Reflex Mount. On a side note, the Warne mount is fantastic. It mounts to the shotgun's rib, securely, and has options for just about any red dot footprint imaginable. I then proceeded to put it on a P320 with a Grey Ghost Precision (GGP) slide. I did this because the GGP slide is cut for a DPP and doesn't have any recoil bosses to make the RS-15 not bolt up. That is where it stays. Not because it didn’t work on the shotgun, but because I like it better on the pistol.

  Besides the ACSS Vulcan reticle and Autolive functionality, the GLx RS-15 has some other great features. First up is the actual window size, which is 26x20mm’s. The window size is decently large and seemed easy for me to get on target with. Next is the RS-15’s top load CR2032 battery. Which also comes with a combo wrench to make removing the battery cover easy. The 7075 aluminum housing is stronger than comparable sights that use 6061 aluminum. Probably most notable, is that the RS-15 has 0.5 MOA click adjustments. Almost all mini reflex sights use a 1 MOA adjustment, and some do not have clicks. Lastly, the buttons on the right side control brightness. It has 13 brightness settings, 3 of which are night vision compatible. The top brightness settings are super bright. 

  The GLx RS-15 is one of the clearest red dots I have used. The clarity is just amazing. I say this because with my astigmatism, red dot’s are usually a little starred out for me, making them a little blurry. Not the RS-15. I don’t know what Primary Arms did to get this red dot so clear, but I like it. Maybe it is the very slightly tinted blue lens. Either way, it works. In fact, it is the first time, in a while, that I can turn the brightness all the way up and not have the dot look distorted. 

  I mentioned running the GLx RS-15 on a shotgun. I wanted to try out a non conventional use for it. I really liked shooting trap with the RS-15. However, the 250 MOA outer ring didn’t really do anything for the shotgun. Something about looking down a long gun barrel that tends to line up the sight. I am not sure if it helped me shoot trap better, but I see how having something like the RS-15 on a field shotgun could be immensely useful. The dot just made aiming at a moving target easier.

  After the shotgun try out, I proceeded to go conventional. Using the GLx RS-15 on a handgun is where it really shines. This is where the ACSS Vulcan reticle can be used to its full potential. I ran some drills with the RS-15 to test it out. I am a little faster, shot to shot, under recoil thanks to the Vulcan reticle. One because it is so clear, and the other because the reticle just helps you find the dot faster. This is definitely a more useful sight on a handgun.

  If you are looking into a red dot that can help you shoot better, the Primary Arms GLx RS-15 might be a good option. Partly due to its innovative ACSS Vulcan reticle. For new red dot shooters, it helps you find the dot and get used to it. For seasoned shooters, it helps you to find the dot faster. The GLx RS-15 even works for non-conventional uses like a shotgun. I have a hard time deciding what would be my favorite feature of the RS-15. Is it the Vulcan reticle, or the sights' clarity? Go check out the Primary Arms GLx RS-15 and see for yourself.

Firearms Insider Reviews - Key Points

Claim to Fame:

Quality red dot with the ACSS Vulcan reticle

Target Market:

Anyone wanting a quality red dot, but also those who will benefit from the ACSS Vulcan reticle

Features, Benefits, and Specifications of this product:

  • 7075 Aluminum construction

  • Hardcoat anodized black

  • Top loading CR2032 battery compartment

  • 5,000 Hour battery life with full reticle on medium setting

  • 25,000+ Hour Battery life with dot reticle on medium setting

  • Side mounted buttons for brightness (13 settings with 3 night vision)

  • Red Dot Bright® ACSS Vulcan Dot reticle (3 MOA center dot with 250 MOA outer circle)

  • Multi-reticle select can be changed between circle/dot and just the dot

  • 0.5 MOA windage and elevation adjustments

  • Autolive® functionality

  • Waterproof and shockproof construction

  • Multicoated lens

  • C-More footprint which is very similar to the Delta Point Pro footprint

  • Includes GLOCK MOS compatible mounting plate

  • Length: 1.84"

  • Weight: 1.11 oz.

  • Aperture diameter: 26x20mm

  • Lifetime warranty

What other aesthetic options or finishes are available?

Dot only version

What others are saying?:

5 out of 5 stars at primaryarms.com

SUPERB RDO WITH DIRECT FITMENT ON SIG PRO-CUT SLIDE

This optic is my third with the ACSS Vulcan reticle, but first PA-branded open reflex (others are HS 507k & 507c). I've become a real believer in this reticle, in either red or green.

Target and sight acquisition are super-fast and consistent -- intuitive, too, once a little muscle memory is achieved. For me, it also had a minimal learning curve, with the added benefit of presentation depth feedback, making it simple to verify the gun is in the correct position for each round fired.

Too far away, the 250 MOA outer ring disappears. In too close, the outer ring circles the 3 MOA dot. At just right, the outer ring guides the dot to perfect target alignment. It's a system beneficial to both experienced shooters and new RDO users, and it just plain works.

This optic, like the HS RDOs, checks all the right feature boxes too, including shake awake, top-mount battery and side-mount brightness.

It’s a real winner. A+ performance and value.

Link to other reviews:

Nothing found as of publishing 

Price point:

MSRP = $359.99

Retail = Same

I need it now! Availability:

Primary Arms

Our Rating: 

Pros:

  • ACSS Vulcan reticle

  • Clarity

  • Autolive motion activation

  • Window Size

Cons:

  • C-More mounting footprint

  • Slightly higher price when compared to similar reticles in red dots

Score: 7.50 Good

Favorite Link:  Primary Arms SLx 1x prism review  

Rost Martin RM1C

Ammo supplied by Target Barn

  A new pistol manufacturer is in town and they hit the streets hard. They are Rost Martin, and if you have not heard of them, you soon will. As of writing, their premier offering is the Rost Martin RM1C pistol in 9mm. The RM1C is a compact pistol, think G19 size for reference. This pistol comes packed with features at an affordable price. Let us find out what makes the RM1C so good.

  This new Rost Martin compact pistol comes ready to go. In the box with the RM1C are 2 magazines. One is a flush fit 15 round magazine. The second one is a 17 round extended one. Both have steel bodies. The 17 round looks like the 15 round magazine but with just a +2 extension. Extra magazines are only $24.50! Yeah, $25 bucks a piece for extra mags. Thank you Rost Martin for making affordable steel magazines. Also in the box is a plate to mount a RMR footprint optic. Plates for different foot print optics are available on the Rost Martin website. Lastly, there are 2 extra backstraps. A small and large one. The RM1C comes equipped with the medium size backstrap. The medium sized one seemed to fit a lot of different sized hands, mine included. 

  Now that we are off to a good start, I will start with the top side of the RM1C, the slide. The slide is constructed from nitrocarburized steel and has a deep black Tenifer finish. On top are non-glare serrations cut from the front to back. These are there to help reduce glare off of the top of the slide. They probably helped and I did not notice any distracting glare when shooting the RM1C. Another quick mention is that the RM1C is cut for Rost Martin’s optic plate. It comes with a plastic cover plate installed. The cover plate also has those non-glare serrations. I used the supplied RMR plate to mount an optic. Rost Martin’s optic plate centers up on a raised boss and locks into the slide at the rear. This system works out well. I have not had any problems with the RMR mounting plate or system. Also on the top are the iron sights. The factory sights are a front post with a white dot, and a serrated U-notch rear. The sights work, but I thought they were a little small and hard to pick up quickly. However, both front and rear sights are dovetailed in using a Springfield XD sight cut. So I proceeded to mount a set of suppressor height sights from XS sights. On the side of the slide are deeply cut, front and rear, slide serrations. These slide serrations work extremely well and look even better. Around the back of the slide is the end cover plate. It is also serrated to reduce glare. More important is that in the center of the back plate is a red safety indicator that tells you when the striker is in the firing position. It is basically the end of the striker, but it is still a nice feature. 

  It is time to get into the RM1C’s frame or grip. The frame comes in 3 different colors: Black, Stone Gray, and FDE. I chose the Stone Gray color. Probably the most notable factor of the frame is its grip texture. I just call it a sand paper texture, but Rost Martin calls it “Responsive Grip Texturing” or RGT for short. The RGT is a “proprietary graduated laser stippling designed to respond, or “grip back,” to the amount of grip pressure exerted by the shooter for an incredibly secure yet comfortable fit”. The texture feels smoothish at first, but as you use the gun, it becomes apparent that it gives you a better grip than you initially thought. I liked the grip texture of the RM1C. Rost Martin also textured the front sides of the frame, just above the trigger guard, where one would rest their thumbs. Rost Martin also designed the RM1C to have a large trigger guard. I really like this for a defensive handgun since one never knows when it might be needed, and you might have gloves on. Next feature is a front picatinny rail for mounting lights or whatever. I’m glad it is a standard pic rail and not some proprietary one. One of my favorite things about the RM1C’s frame is its width. It has a very thin profile. But unlike some “thin” pistols, the ergonomics of the Rost Martin are fantastic. The RM1C is noticeably thinner than a G19 or my Polymer80 19’s. The pistol is super comfortable in the hand.

  I would be remiss if I did not mention the trigger. The Rost Martin RM1C has one of the best striker fired triggers I have felt in a while. It has a short smooth take up, a little under ¼ inch. Followed by a crisp 5 pound break. With very little overtravel. The reset is forceful and tactile. This trigger makes the RM1C easy to shoot. Rost Martin uses a flat faced trigger design to give the user a good feel. Yes, the trigger still has that common flipper safety in the center, but it isn’t very noticeable. Especially since the face of the trigger is pretty wide. When I first saw the RM1C, I didn’t know what to think about the trigger, at least visually. But after using it, I almost immediately started liking it. I really like the overall trigger feel of the RM1C.

  The RM1C is a full ambidextrous (ambi) firearm. When I say full ambi, I actually mean full ambi. The slide release is located on both sides of the frame. It is also in a great location. Not back enough that you will inadvertently hold it down, but not too far forward to where you can not reach it easily. I like the slide release position. The magazine release is also full ambi. Not reversible like other manufacturers that claim “ambi”. Just push either side to drop the magazine free. This magazine release is kind of a teardrop shape. It is also radiused so that it doesn’t snag on anything. I would like an option for a slightly raised version, but the stock magazine release functions flawlessly.

  I have been using the Rost Martin a lot. It has over 1000 rounds of various 9mm ammunition through it. Including 700 rounds supplied by Target Barn - 500 rounds of American Eagle 115 grain and 200 rounds of PMC 124 grain. All of the Target Barn supplied ammo ran flawlessly. As did the various 300 plus rounds of cheap ammo I fed it. I also ran a magazine of some old Speer Gold Dot +P’s I had lying around. The RM1C ate up every ammo I fed it to include: 115’s, 124’s, 147’s, and even some 165 grain subsonics. Did I mention that I also didn’t clean the gun? Yeah, there is that. I also only oiled the gun initially when it came out of the box. I guess I should go clean and oil the RM1C now. The pistol had about 450 rounds through it before I mounted up a red dot. All the rest were with a red dot mounted to the slide. 

  I just recently started carrying the RM1C around. Mainly because I did not have a good inside the waistband holster. That changed thanks to Werkz holsters. The RM1C carries really nice. It doesn’t feel as heavy as my glockish 19’s. Plus the rounded corners of the RM1C really smooth out its outline. Especially under just a T-shirt. There are plenty of good holster makers making RM1C holsters. Rost Martin even listed 3 or 4 when the pistol first came out. It is always nice when a new manufacturer has holster support from day 1.

  The RM1C is a fantastic pistol. I really like shooting it. The performance has been astonishing. I always try to run review items in some sort of shooting match, if I can. So I ran the RM1C in a steel challenge match before I put an optic on it. This is when I realized that I didn’t like the small sights. Of course, the RM1C ran the match without any hiccups, which I can’t say about the shooter. When shooting the RM1C, it feels good. Recoil is controllable and the grip texture doesn’t seem to be overly aggressive. In fact, some may say it needs more texture. But since I think the RM1C is a “do all” pistol, which includes carry, I really like the grip texture. Everything on the RM1C exudes quality. It has top notch machining on the slide. The frame doesn’t have any molding marks. It is just a beautiful pistol. I also got usable accuracy out of the RM1C. At 25 yards, off hand, I would get around 3-4 inch 5 shot groups. It did not seem to care what ammo I ran through it either, the groups all seemed about the same. If you put it in a rest, I would bet the accuracy would be fantastic. If you have not figured it out by now, the Rost Martin RM1C is a great pistol right out of the box.

  Rost Martin is going to be making waves in the handgun market. Their entry into the handgun market is a solid buy. The RM1C will only set you back about $450 dollars, which is really a fantastic deal for all the features you get. The RM1C has holster support and with its standard picatinny rail, will take almost any light you decide to install on it. If you are looking for a pistol that hits above its price range, definitely take a look at the Rost Martin RM1C

Firearms Insider Reviews - Key Points

Claim to Fame:

Compact 9mm handgun with a decent feature set

Target Market:

Concealed carry, Home Defense, Target shooting, Personal Protection, or anyone just wanting a compact handgun

Features, Benefits, and Specifications of this product:

  • GRIP WIDTH: 1.1"

  • LENGTH: 7.1"

  • SLIDE: Nitrocarburized steel slide

  • BARREL: 4" hammer forged in 9mm

  • SIGHTS: Rear: Black serrated Front: White dot - Springfield XD/XDM compatible 

  • MAGAZINES: (1) 15 - Round (1) 17 - Round

  • WEIGHT: 21.1 oz. with flush mag 21.5 oz. with extended mag

  • TRIGGER: 5 pounds, Double Action Striker (DAS)

  • HEIGHT: 5.0" with flush mag 5.5" with extended mag

  • Optics ready, RMR optics plate included with the gun - other plates available through the website

  • 3 Back Straps included

  • Ambidextrous Magazine release and slide stop 

What other aesthetic options or finishes are available?

Black or Flat Dark Earth

What others are saying?:

TODD K at Guns.com  

Excellent value and quality

Excellent value and quality, I would highly recommend this firearm. You can't find another pistol in this price range that's the same quality and has the same features.

Link to other reviews:

Chris from the 740  

RTT: Guns & Gear   

GunsandAmmo.com   

Price point:

MSRP = $459.00

Retail = Around $400    

I need it now! Availability:

Guns.com

gun.deals

or your local FFL

Our Rating:

Pros:

  • Trigger

  • Ergonomics

  • Full ambidextrous

  • Comes Optics Ready

  • Flawless performance

Cons:

  • Small Iron sights

Score: 8.50 Great

Favorite Link:  Viridian RFX 35 review